Building a Two-Level Quail Hutch for Indoors
Quail are one of the easiest and fastest growing fowl to raise for meat or eggs. They are especially valuable to the homesteader that has livestock restrictions or is limited on space, because quail can easily be guised as “pets” and are overall fairly quiet when given the proper housing arrangements.
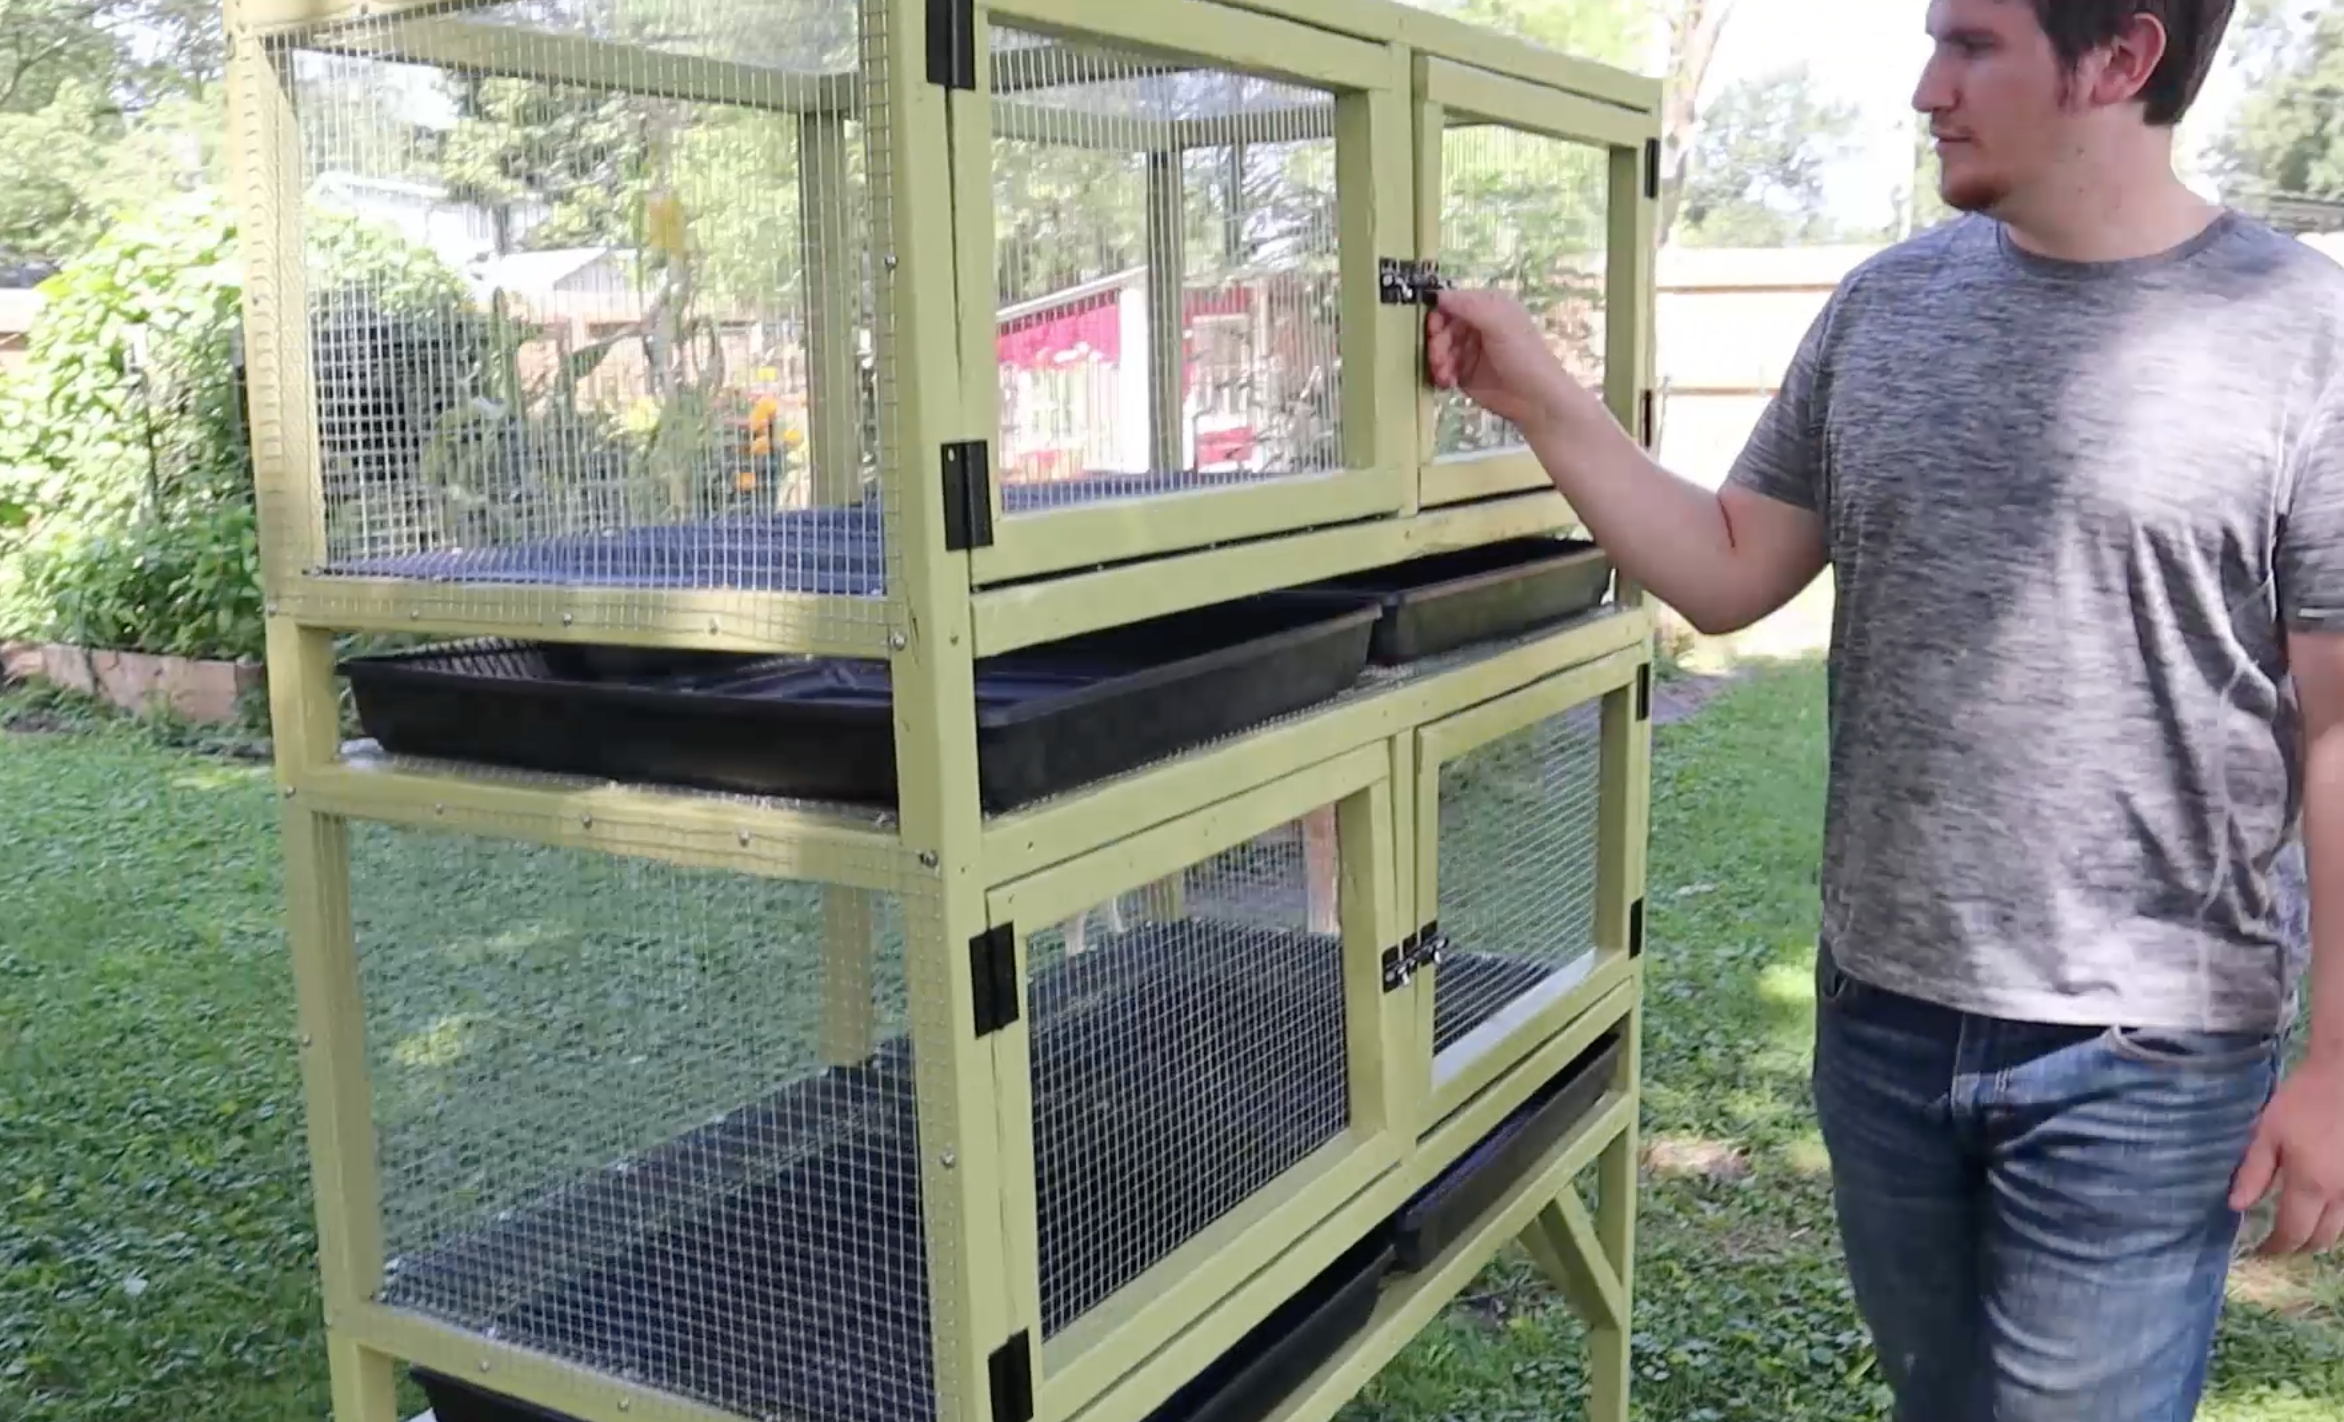
This hutch has an open roof and is designed to be kept in a garage or shed, out of the elements. Casters make for easy moving and cleaning. It has two levels that are both 2ft deep by 4ft wide. It is made with a wood frame but has all-wire sides, roof, and floor for sanitation and ease of cleaning.
Features
Casters
Four casters attached to the bottom of this hutch makes it easy to move around. I give my quail a fresh sand bath every week or two, and they love to fling that sand everywhere!! It has definitely been helpful to be able to easily move the hutch out so I can sweep behind it.
Protection from Weather
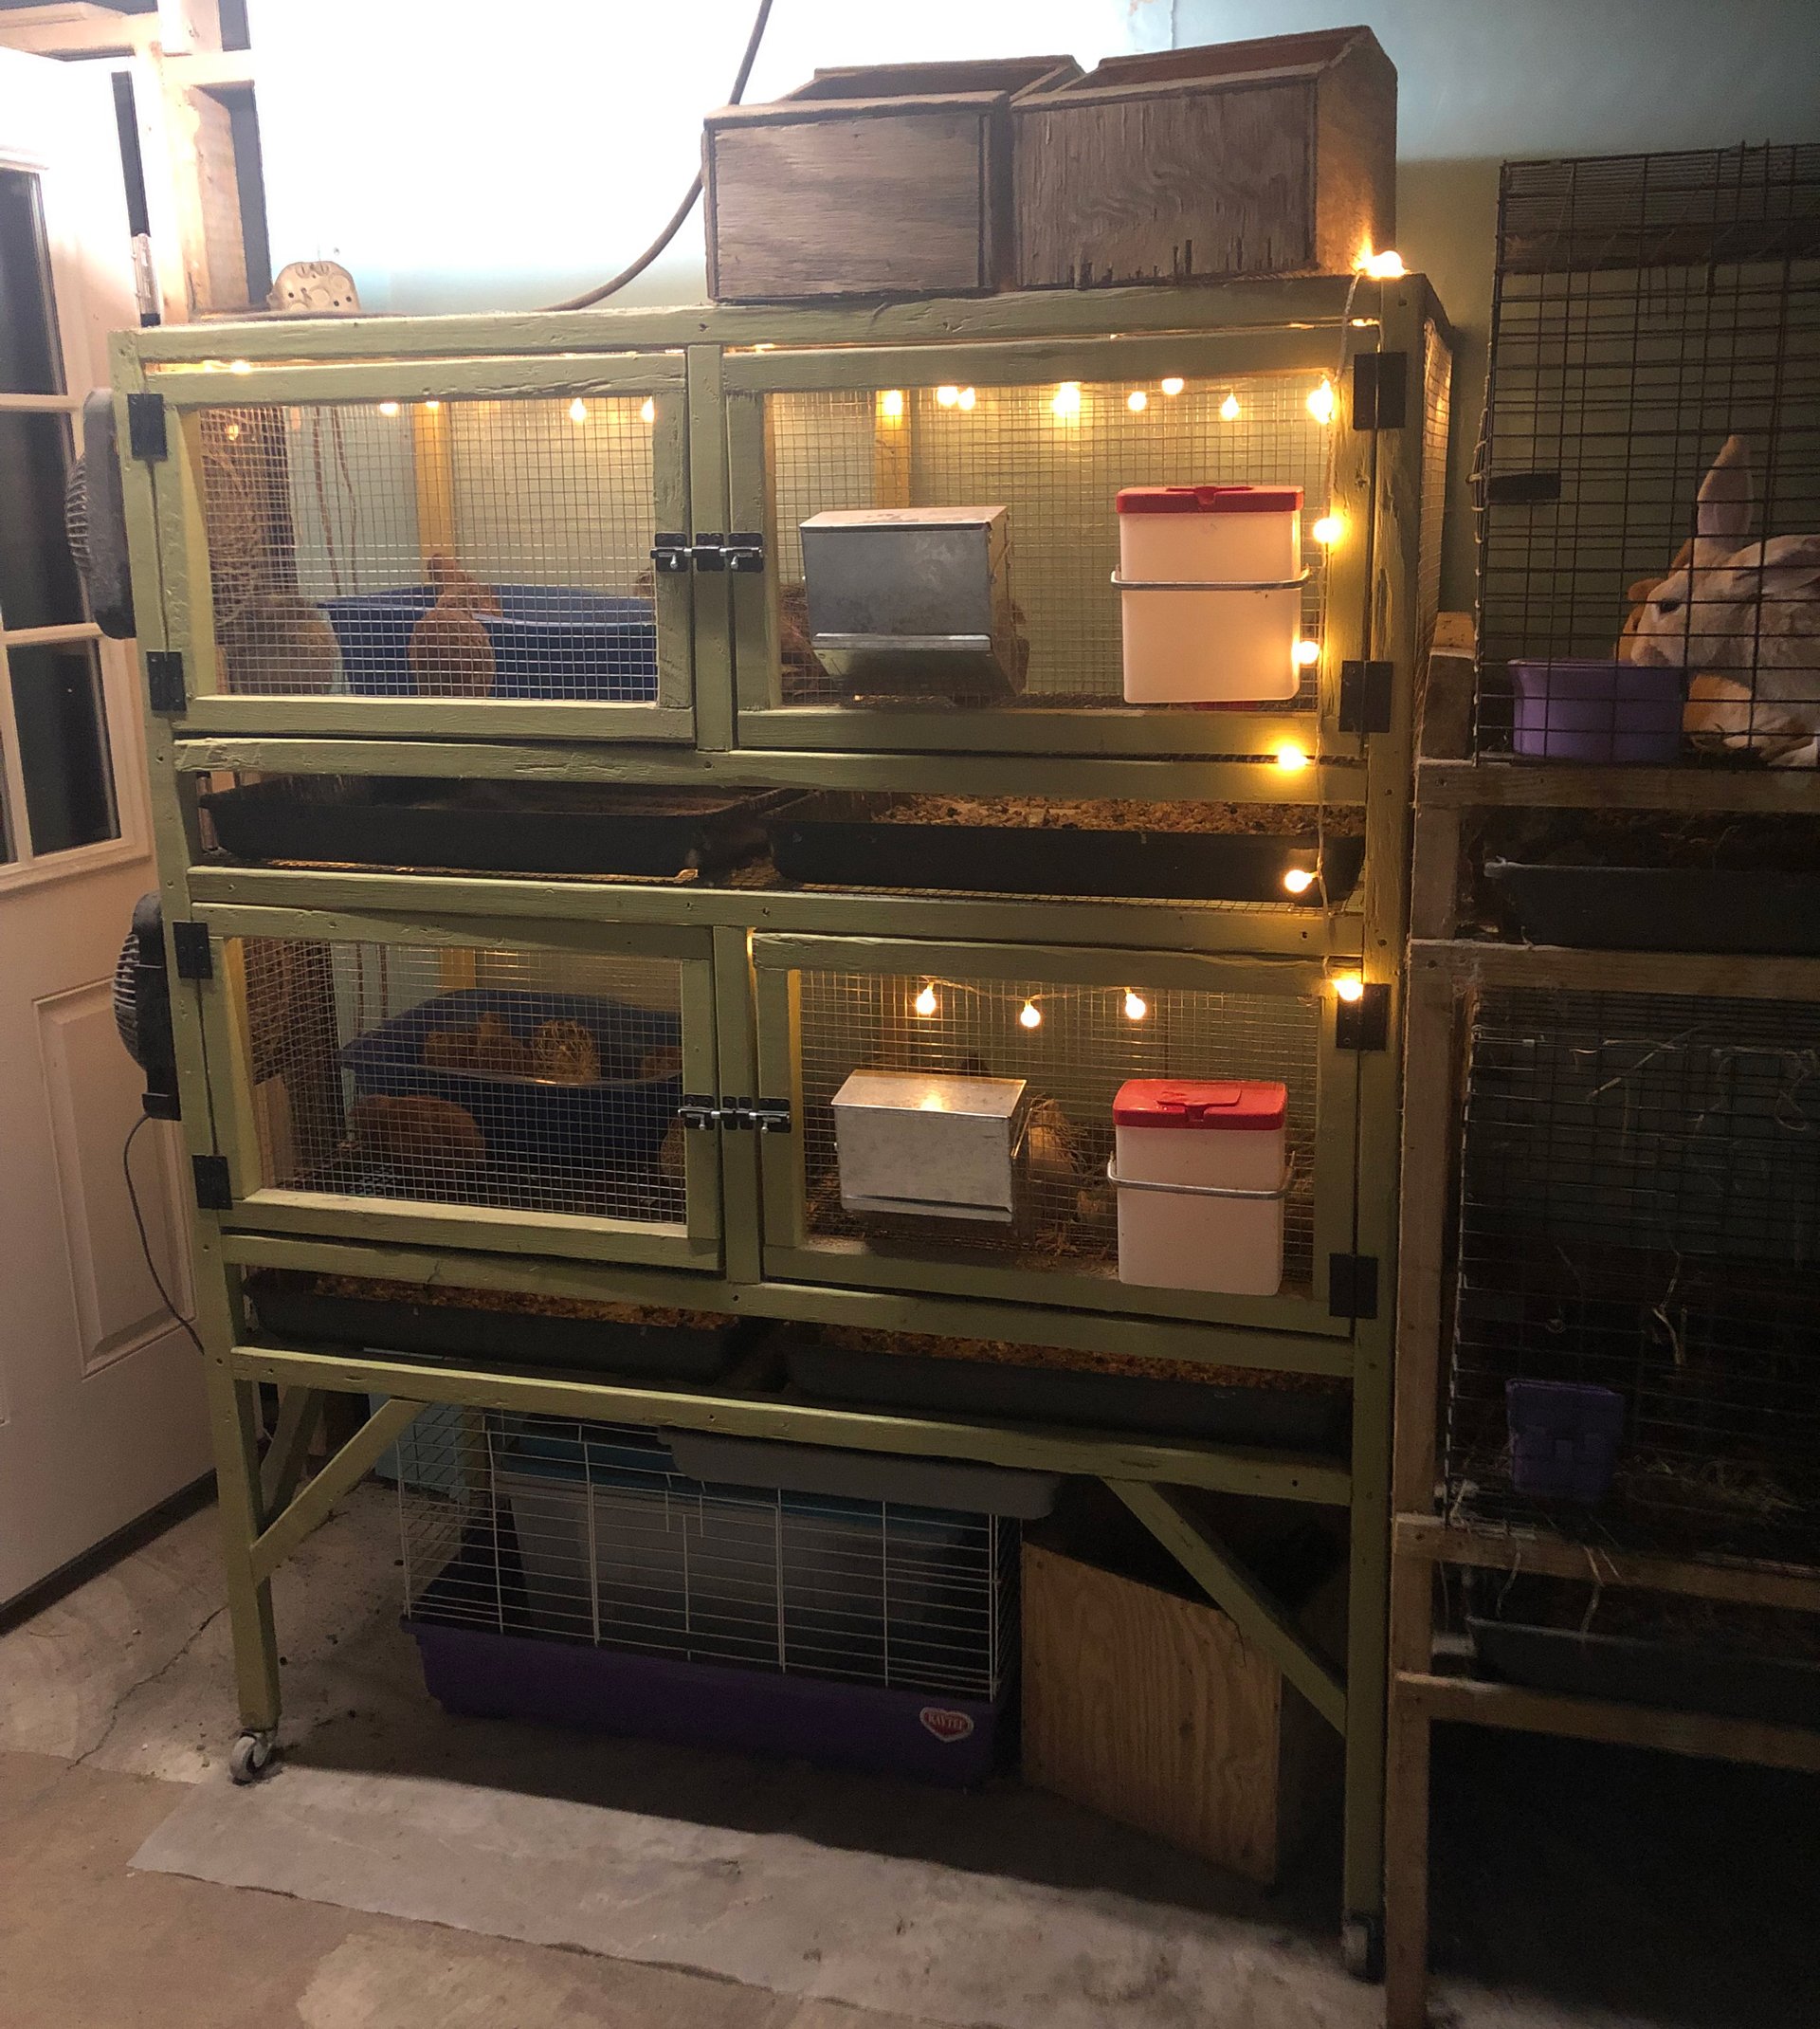
While outdoor quail hutches with adequate shelter are perfectly acceptable, I opted to house my quail indoors, in the back room of our garage. Doing this has taken the worry of winterizing out of my hands, since the quail will stay dry and draft-free. In the summer we strap fans to the side of the hutch for gentle air-flow and to keep the ammonia-smell from building up.
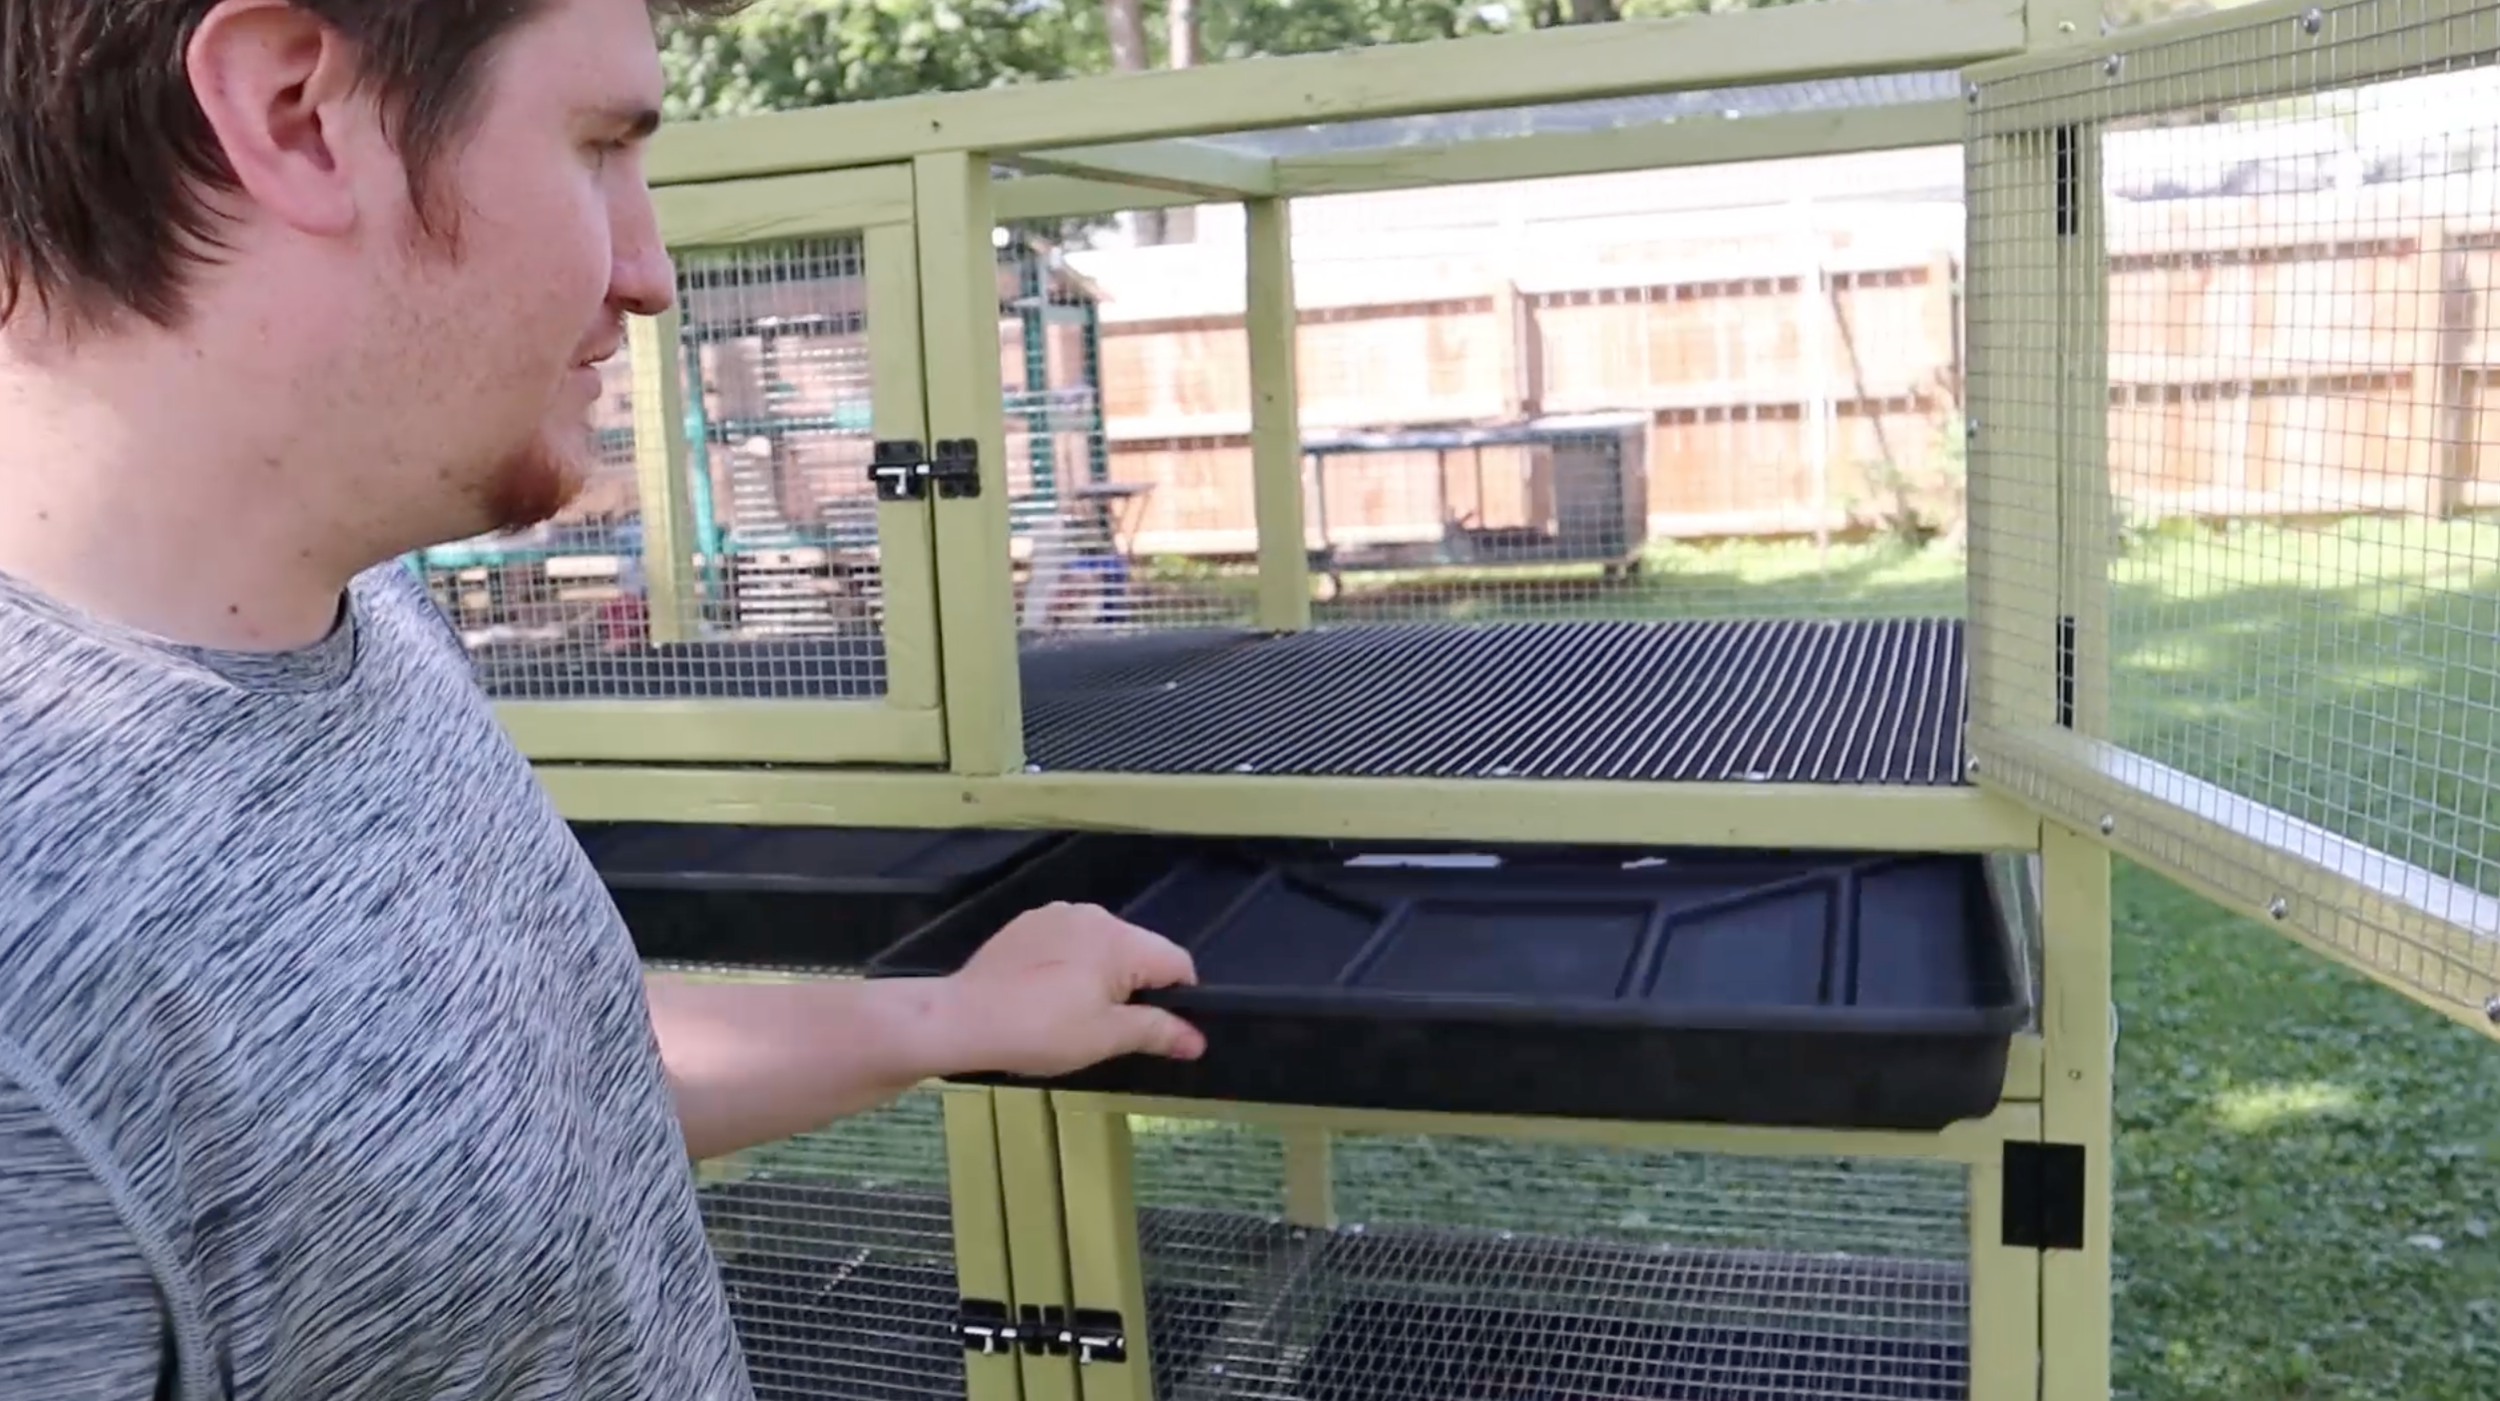
Wire-Bottom Floor and Trays
A proper wire-bottom floor is a wonderful option for quail because of how much they poop! A standard “hardware cloth” floor was just not good enough in my opinion, so we dropped the money on some nice, thick, PVC-coated wire to assure that our quail would never get sore feet. It was an investment, but our animals do so much for us, and I think they deserve it.
And the trays - I know, I know - a couple years ago I said I was sick of trays, but that was when I had a poorly designed rabbit hutch where the trays were nearly impossible to remove. The way this quail hutch is designed, the trays come out super easily. They are a snap to clean weekly, and this build has actually caused me to change my mind about trays in general. Shocker, I know.
The Build
Materials:
Approximately 18 - 2x2’s (8ft) AKA Furring Strips*
2 3/4” screws
1” lath screws
4 - Rubber Swivel Casters (2” minimum)
Standard (19 gauge) 1/2” x 1/2” Hardware cloth for roof, sides, and doors
Thick-gauge wire for the floor (I used 14 gauge PVC coated wire)
4 - 24x24 plastic trays
8 -Hinges
4 - Bolt latches
*Treated wood isn’t really necessary for this hutch since it is build to be indoors. To add to the longevity of the wood and for aesthetic purposes, you can paint it like we did!
Tools:
Drill
Circular Saw (wood & metal blade)
Measuring Tape
Carpenter’s Square (my best building friend)
Hammer
Twist drill bit
Level
Optional:
Paint color of choice + paint brushes and/or rollers
Step 1: Cut the 2x2’s
(4) Legs - 63”
(10) Middle supports - 49.25”
(4) Vertical supports - 15”
(21) Horizontal supports - 22”
(8) Leg braces - 14” - cut at a 45 degree angle on both ends
(8) Door tops/bottoms - 23.625”
(8) Door sides - 11.75”
Step 2: Paint (Optional)
We did not paint the quail hutch before assembling it, and I REGRET it!! It takes so much less time to paint when you have all of the pieces laying out flat, in comparison to all of the nooks and crannies that we had to maneuver around after assembling. So, if possible, paint your pieces very first. It will save you a ton of time and work in the end.
Painting is of course, optional, but I do find that aside from giving my projects more of a finished and personalized touch, it does a good job at preserving the wood for a long longer (especially when using untreated wood).
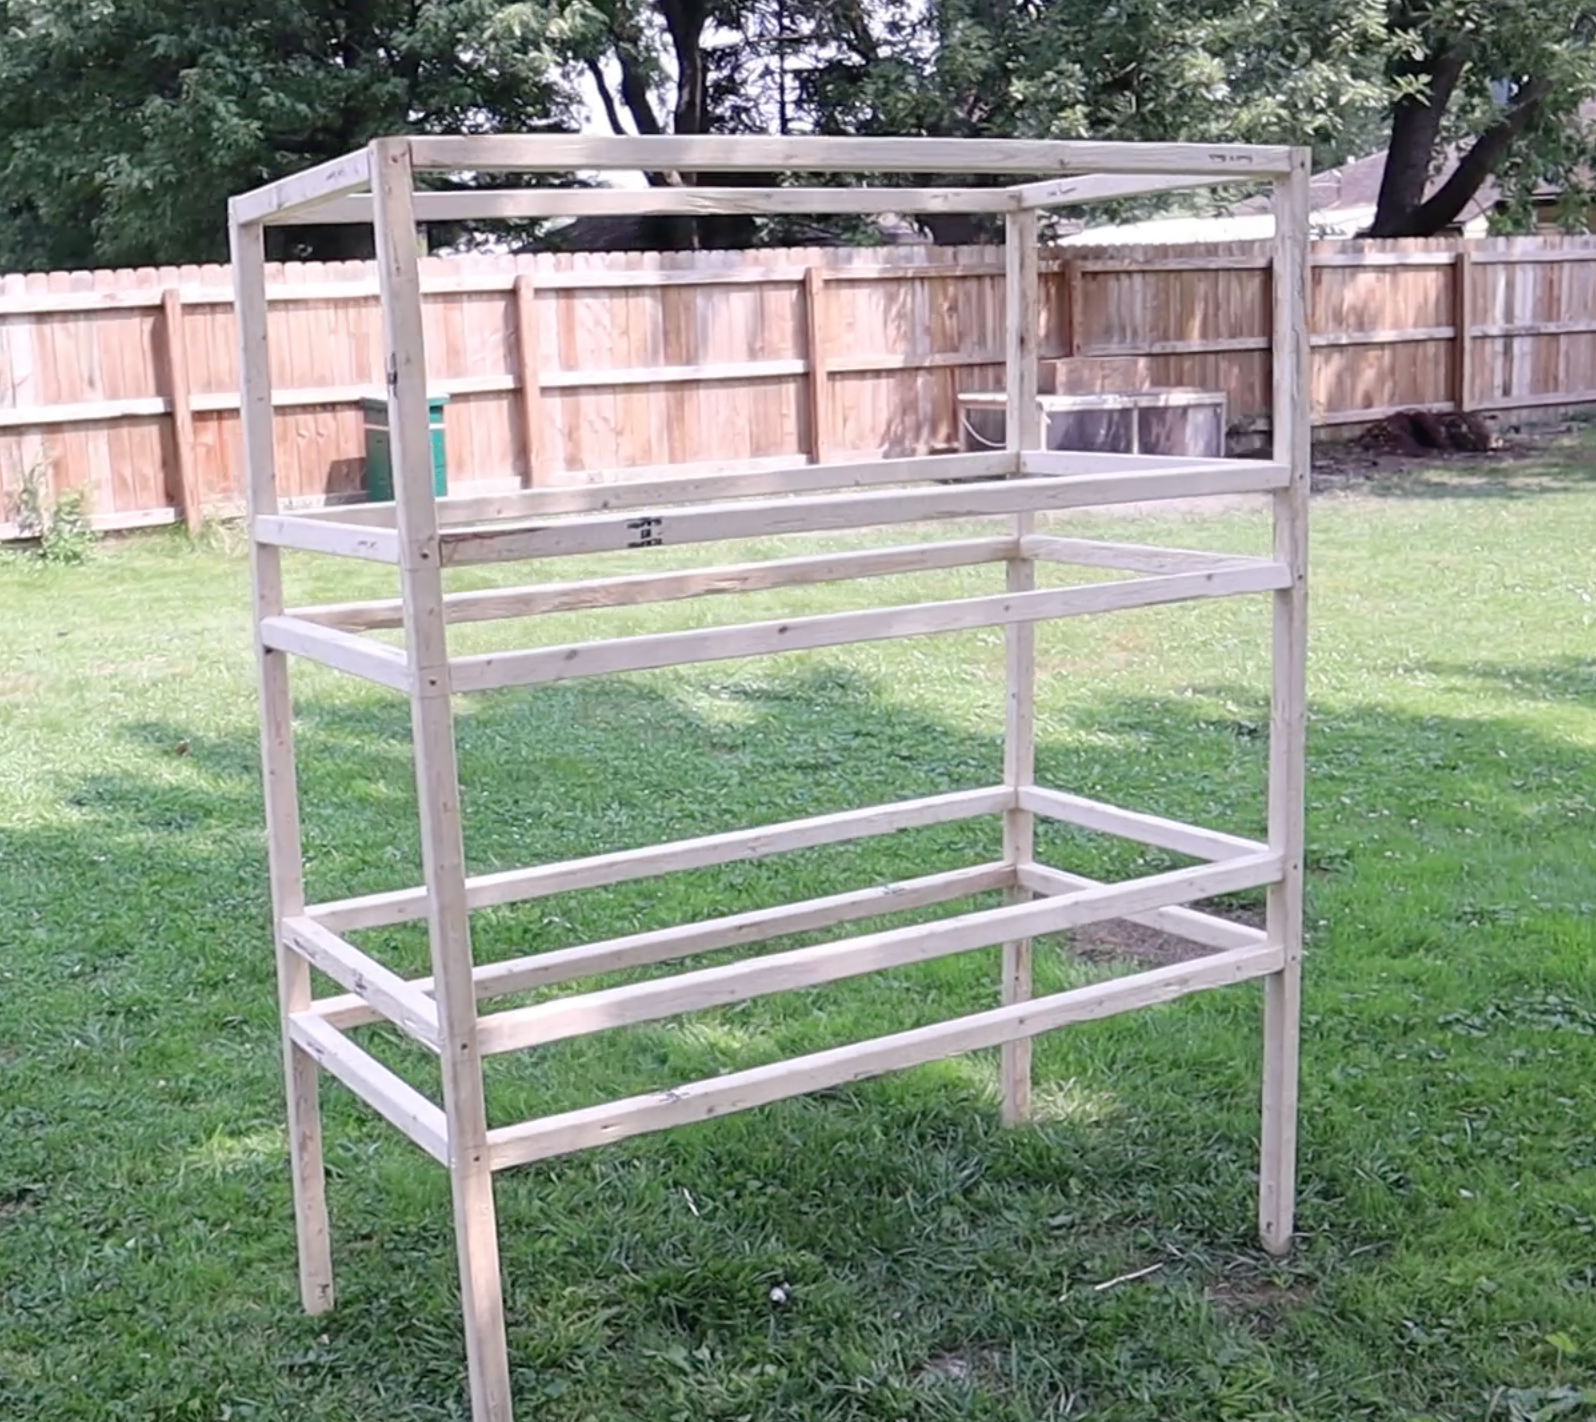
Step 3: Assemble the Sides
First up we need to assemble the sides of the qual hutch. On each of your 63” tall LEGS, measure from the bottom up - 17.5”, 23”, 39.5”, and 45”. Use your carpenter’s square or straight-edge to draw a line at those measurements. We want our 22” HORIZONTAL SUPPORTS sitting directly above those lines, so use it as a guide and screw them in carefully.
Note that on 2x2’s, especially untreated furring strips such as what I used, split REALLY easily. I would highly recommend using a twist drill bit to create a shallow pilot hole wherever you will be screwing into these. Trust me, I have learned the hard way more than I’d like to admit.

When you are done, you should have two pieces that look like the diagram above. These are our sides, and next up, we will need to “sandwich” them together using our middle supports.


Step 4: Connect it All Together
There’s really no need to measure for this next part since we have our sides put together, so this makes it easy! In each spot where we placed a 22” piece on the side, we will be screwing in a 49.25” MIDDLE SUPPORT directly perpendicular to this. Plan your pilot holes carefully to avoid the first screw we placed when creating the sides.


Now that we have our basic structure complete, we need to add some finishing touches. First off we need to add the 14” LEG BRACES, or diagonal supports, to the legs. These braces will help keep the legs strong and straight. You should have 8 of these total - two for the front, two for the back, and two for each side of the hutch.
Now we also need to add the VERTICAL SUPPORTS to the outside of the hutch, and more HORIZONTAL SUPPORTS to the inside of the hutch. The vertical supports on the outside will ensure that our hutch doesn’t sag in the middle, while also giving us a place to put the bolt latches we will be using to secure our doors shut. The horizontal supports on the inside will ensure that we have something to slide our trays on top of, as well as give our floor a little more strength and stability.

The first illustration above shows us where to put our VERTICAL SUPPORTS, which are 15” tall (the exact space between both of the two levels). You should have four of these - two for the front and two for the back. You’ll want to measure to the very center of your hutch - I measured from the inside of the legs to the middle, which ended up being right around 24 5/8” in my situation. You will want these pieces, especially the front of your hutch, to be as exact as possible to snugly and equally fit our doors in on either side.
The second illustration above shows measurements of where to put each of your HORIZONTAL SUPPORTS, which are all 22”. The red squares show where I ended up measuring and putting mine. I wanted to be sure that I could slide my trays in without them falling and spilling out. It’s especially important to put these supports in on the bottom level.


The photos above show the assembled frame and the installation of a leg brace.
Step 5: Cut and Attach the Floor
I kind of went all out when it comes to the flooring for my quail. I had been stalking lots of quail forums and reading several books about quail prior to building this hutch, and in my research I learned that, much like rabbits, quail can develop sore feet and injuries from thin-gauge wire. That is why, just like for my rabbits, I upgraded to the thickest gauge wire-bottom flooring I could afford. And for the quail, I even scoped out PVC-coated flooring. I do not anticipate having any sore feet problems with this investment :) Wire like this can be purchased from several online retailers, but I purchased mine from KW Cages. I opted for 1/2” x 1/2” wire and couldn’t be happier!
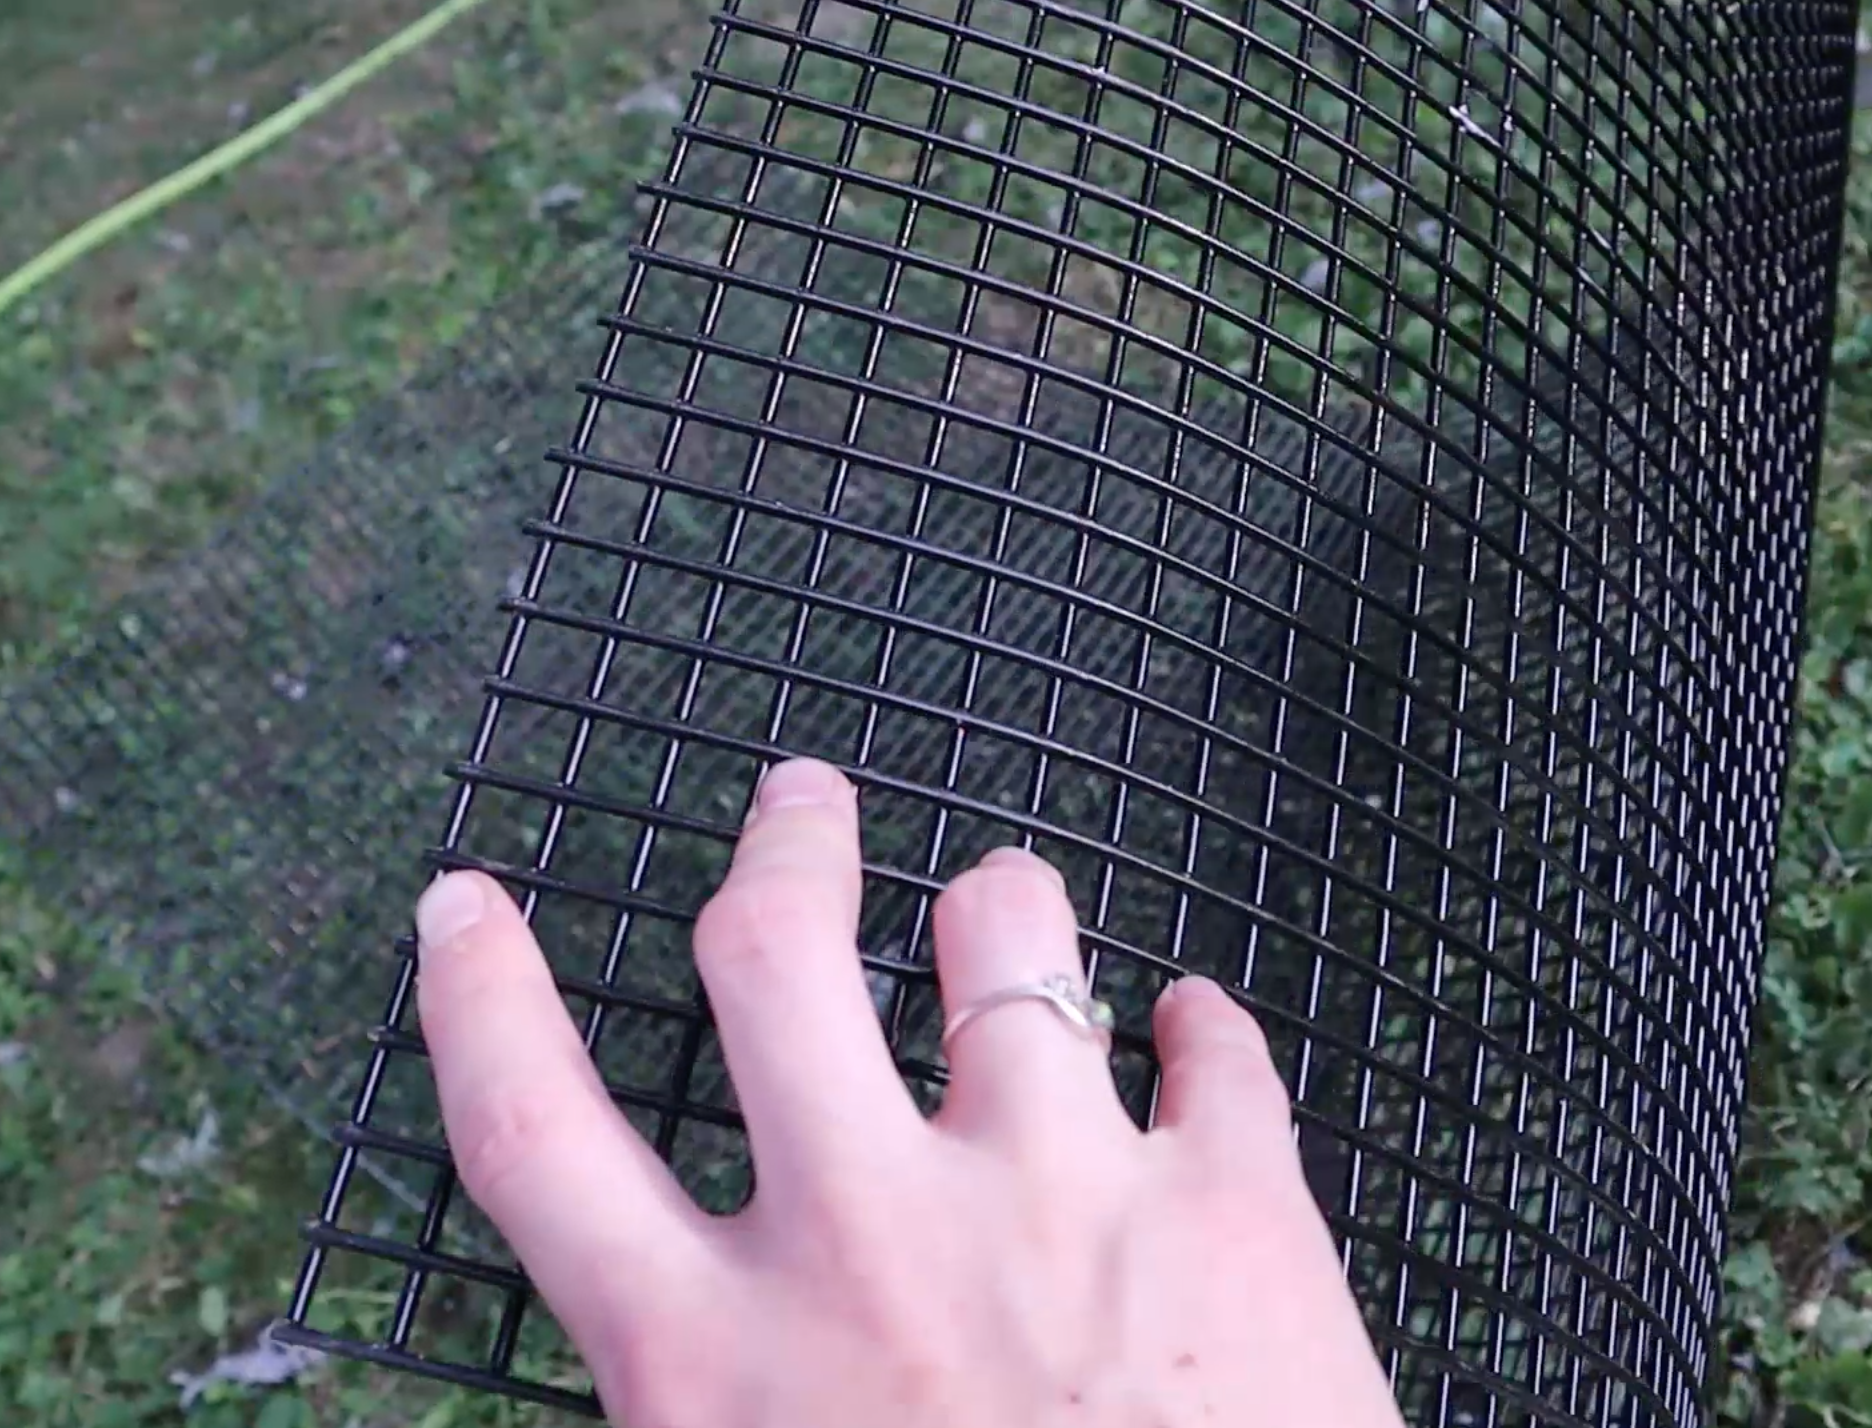


We measured out the dimensions for each level of the hutch and cut the corners out. It was a tight fit, but we ended up creating the puzzle-perfect fit on both the top and the bottom. We used lath screws to tightly secure the flooring down. I find lath screws to be so important for most of my builds - I HATE u-shaped staples! The are a pain to me. Plus, these screws allow me to easily replace wire if it is to ever get damaged.
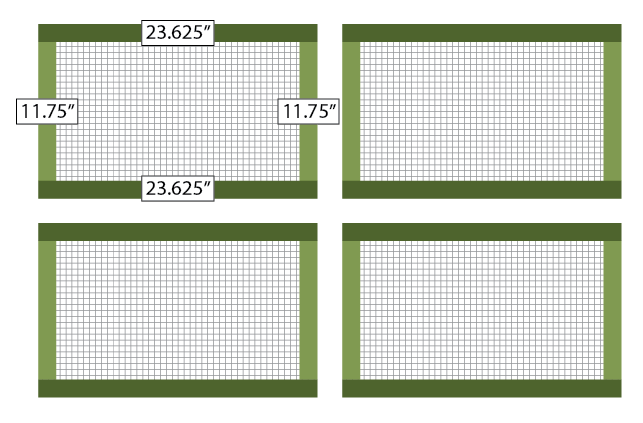
Step 6: Assemble the Doors and Install Them
Now that the hutch frame is completed, it is time to assemble and install the doors! The TOPS and BOTTOMS of our doors are 23 5/8” (23.625”) and should be screwed down on top of the door SIDES, which are 11.75”. I would recommend screwing one of these doors together and doing a test to make sure that these doors will fit into the hutch structure. This was a super snug fit for my hutch, but in the end it worked out perfectly.
Once you do a test fit and make any adjustments or modifications that you may need, you may then create the rest of the door frames and attach standard hardware cloth to them. Standard hardware cloth is typically a thin gauge like 19ga. 1/2” x 1/2” wire is best because even the smallest quail can’t fit through it! It is also fairly predator proof from animals like raccoons and possums.


Once your doors are completed, you are ready to screw on some hinges on the sides and attach them to the hutch frame. Once you have your doors properly attached, install bolt latches to securely latch them shut. Having two doors on your quail hutch helps to avoid escapees - typically I will open one side of the hutch and they will all run to the other side, and vice versa.
Step 7: Attach the Roof and Sides
I didn’t record or take many photos of this step because it is very mundane - essentially, we need to cover the quail hutch in hardware cloth. You can see some images below of how we did this. I just cut my hardware cloth to size and screw it on tightly with lath screws from the outside. I did this on the back and the sides (our doors are on the front) as well as the roof and even above the first level. I debated back and forth whether or not if was necessary to add the hardware cloth in between levels like that since the trays would be sitting there, but in the end it has been worth it for the peace of mind alone. My quail don't escape when I am cleaning the top level’s trays, and I don’t have to worry about predators breaking in.
Step 8: Install the Casters, Trays, Feeders, & Waterers
Well guys, the rest is pretty straight-forward! All you have left to do is install your 24” x 24” trays, waterers, feeders, and optional casters.


I have linked some affiliate links below of some of my favorite items to use for our quail hutch - including the globe lights, which I installed at a later date (HIGHLY recommend, to add extra daylight and for overall aesthetics).


Chick Brooding Supplies
Quail Hutch Supplies


I live in north-central Indiana in the country with my husband, our two dogs, and a lot of animals :) I love to craft and DIY and I’m obsessed with learning new things. I am driven by coffee and my love for animals. Learn more…