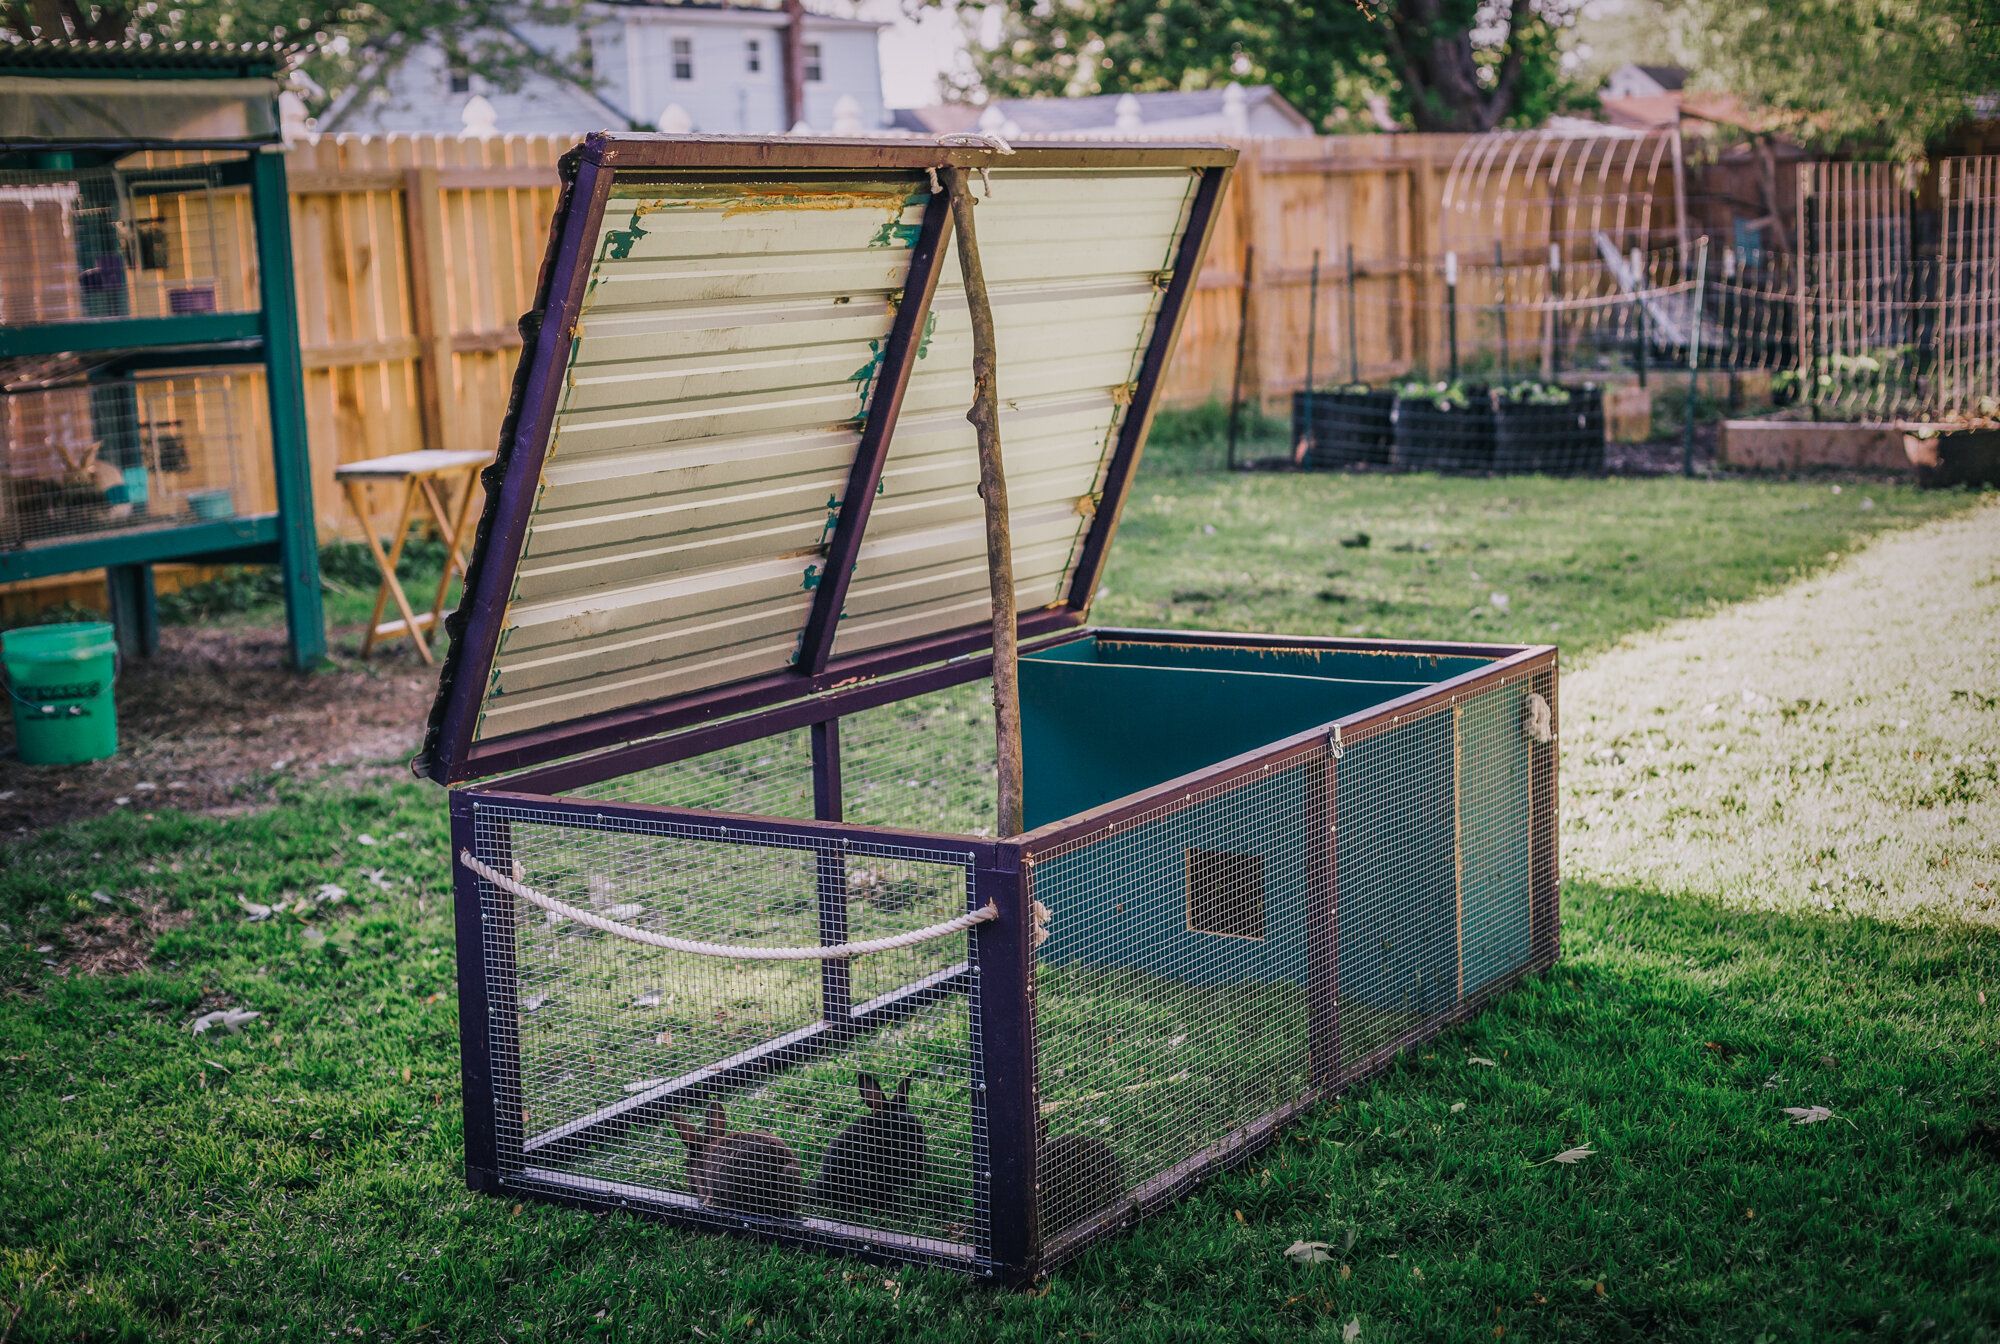
Building a Rabbit Tractor
There are so many rabbit tractor designs out there. I’ve created several different rabbit tractors over the years, and with every new build I learned something new and kept trying to perfect it. I think that over time, I’ve created one of the safest and most efficient designs out there. My rabbit tractors don’t push the grass down in the middle and offer a hiding place for rabbits that feel threatened. They can be placed on moderately uneven terrain if needed, and they are dig-proof around the edges.
What You Need
Cuts of Lumber:
6 - 2x2’s @ 6ft
7 - 2x2’s @ 36”
2 - 2x2’s @ 22.5”
4 - 2x4’s @ 22.5”
2 Pieces - 1/2 Plywood cut @ 36” x 24.5”
2 Pieces - 1/2 Plywood cut @ 12” x 24.5”
Note: I use untreated furring strips for my rabbit tractors. I always paint my rabbit tractors with latex paint (which is water-based) to add an extra element of weather-proofing. There are two main reasons for my choice in lumber:
Untreated wood is much lighter and easier to move around, which is vital for me since I pull my tractors to a new location every day.
The chemicals used in treated lumber can be toxic for rabbits to ingest. With my method of using untreated wood and paint, I am much less worried about them ingesting something that might cause illness.
Additional Materials Needed:
Paint (optional - adds more weather resistance)
Hardware cloth - 1 roll of 25ft x 24”
PVC-coated garden fencing, 3x2 openings
Corrugated metal roofing (3.17ft wide x 75” long is perfect - you may have to cut an 8ft panel to get to this length)
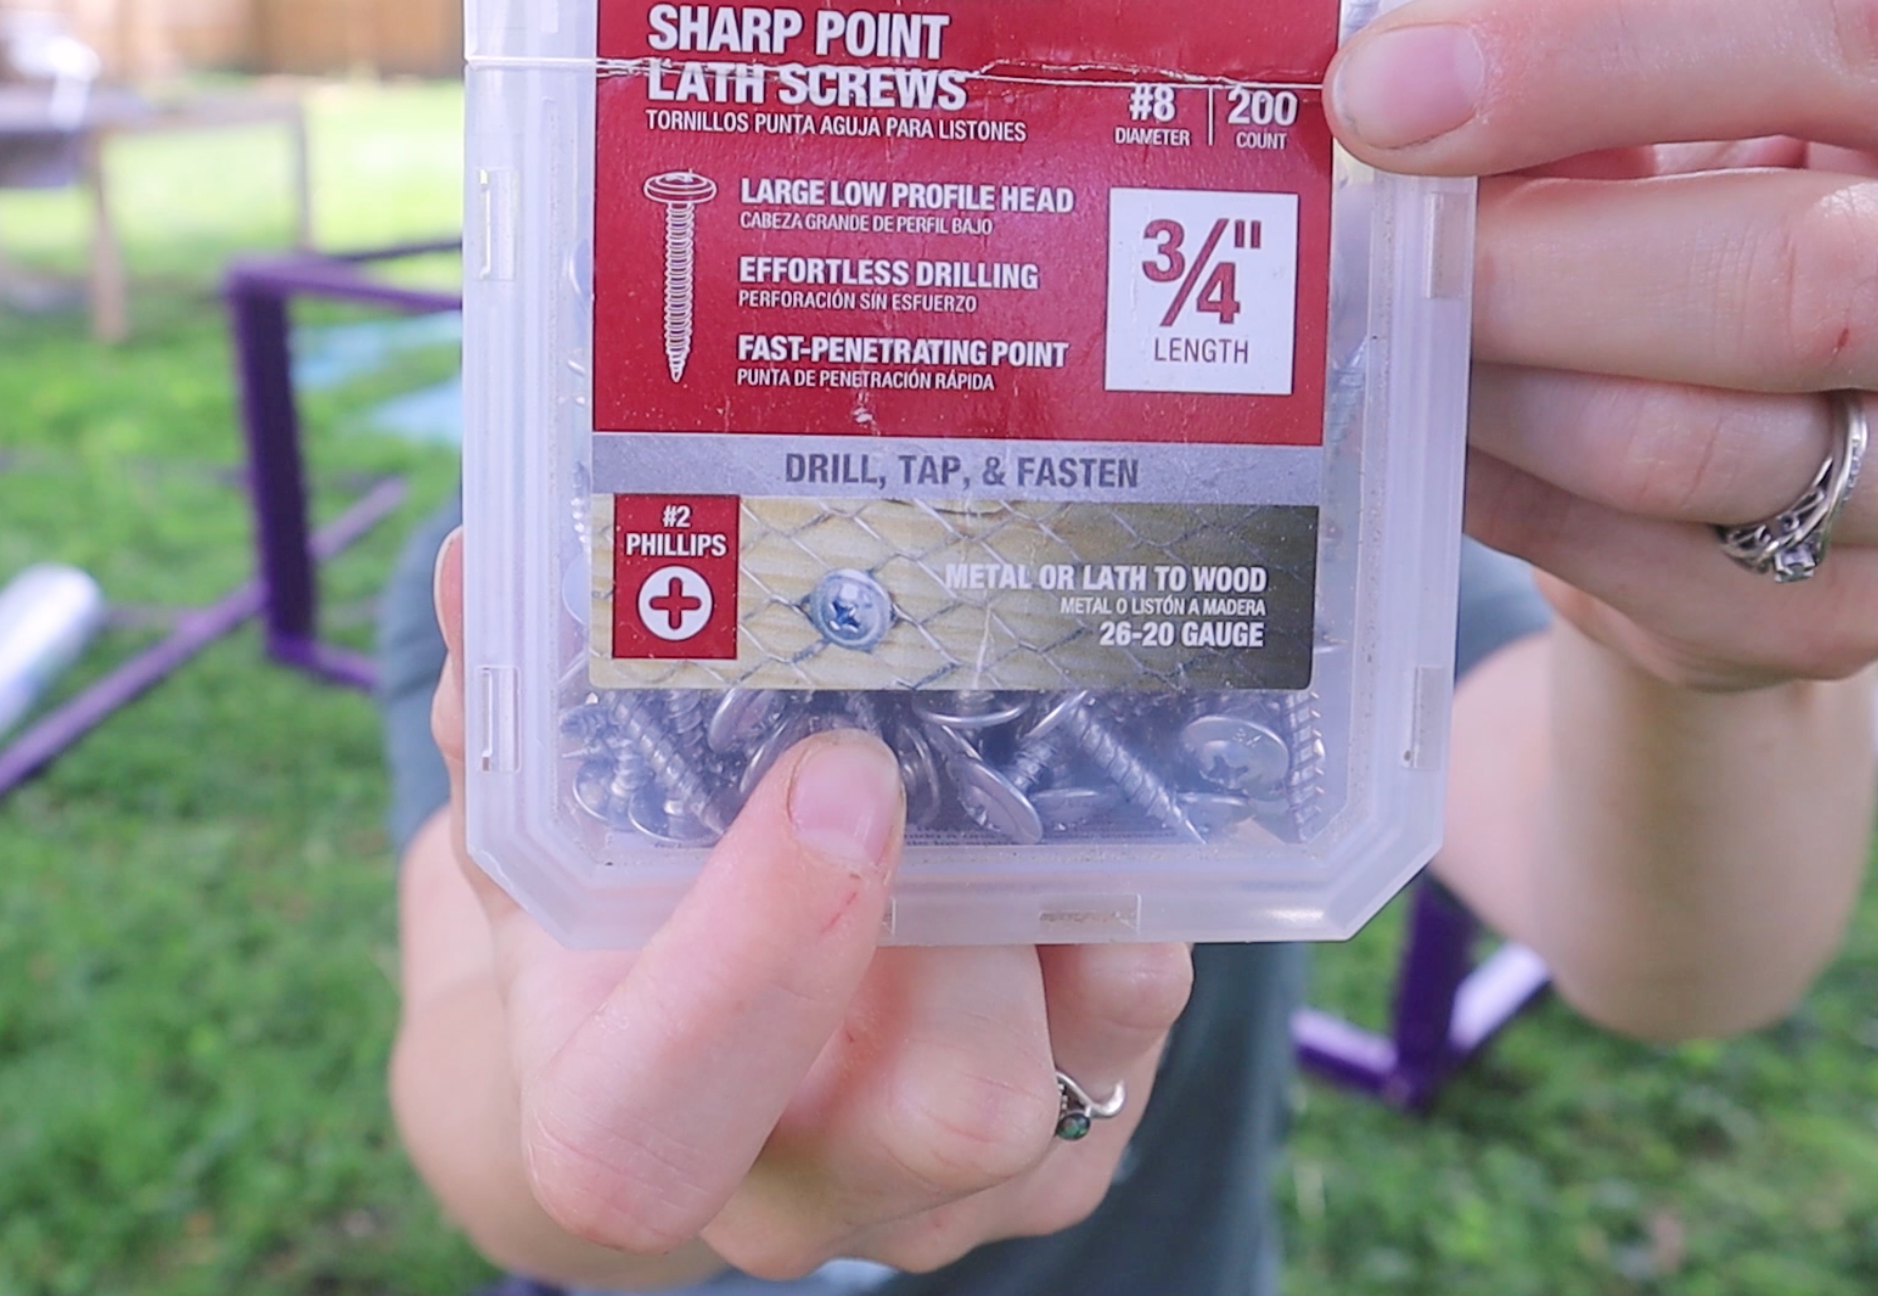
Lath screws
Roofing screws
Cotton rope
2 - Door hinges
1 - Touch catch (to lock the lid)
Tools:
Drill
Circular Saw
Measuring Tape
Carpenter’s Square
5/8” twist drill bit (wood)
Dimensions


The Build
Step 1: Make All Lumber Cuts
First we need to start out with all of the wood pieces that will be necessary for building our rabbit tractor. The lengths and dimensions for all cuts is listed above, but here is a graphic showing all of them, for all my visual learners out there :)
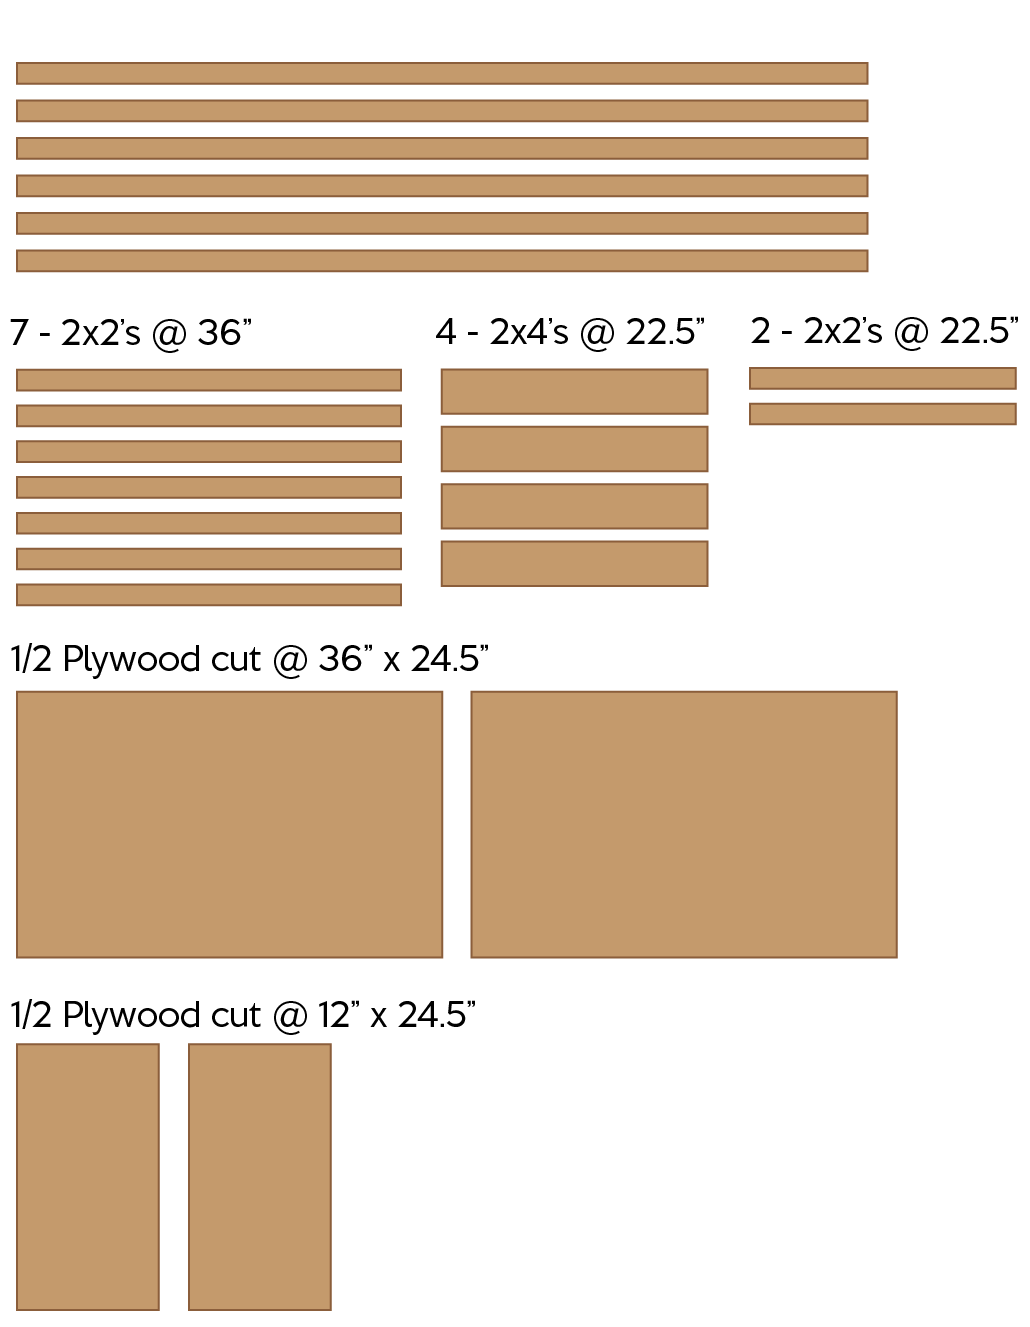
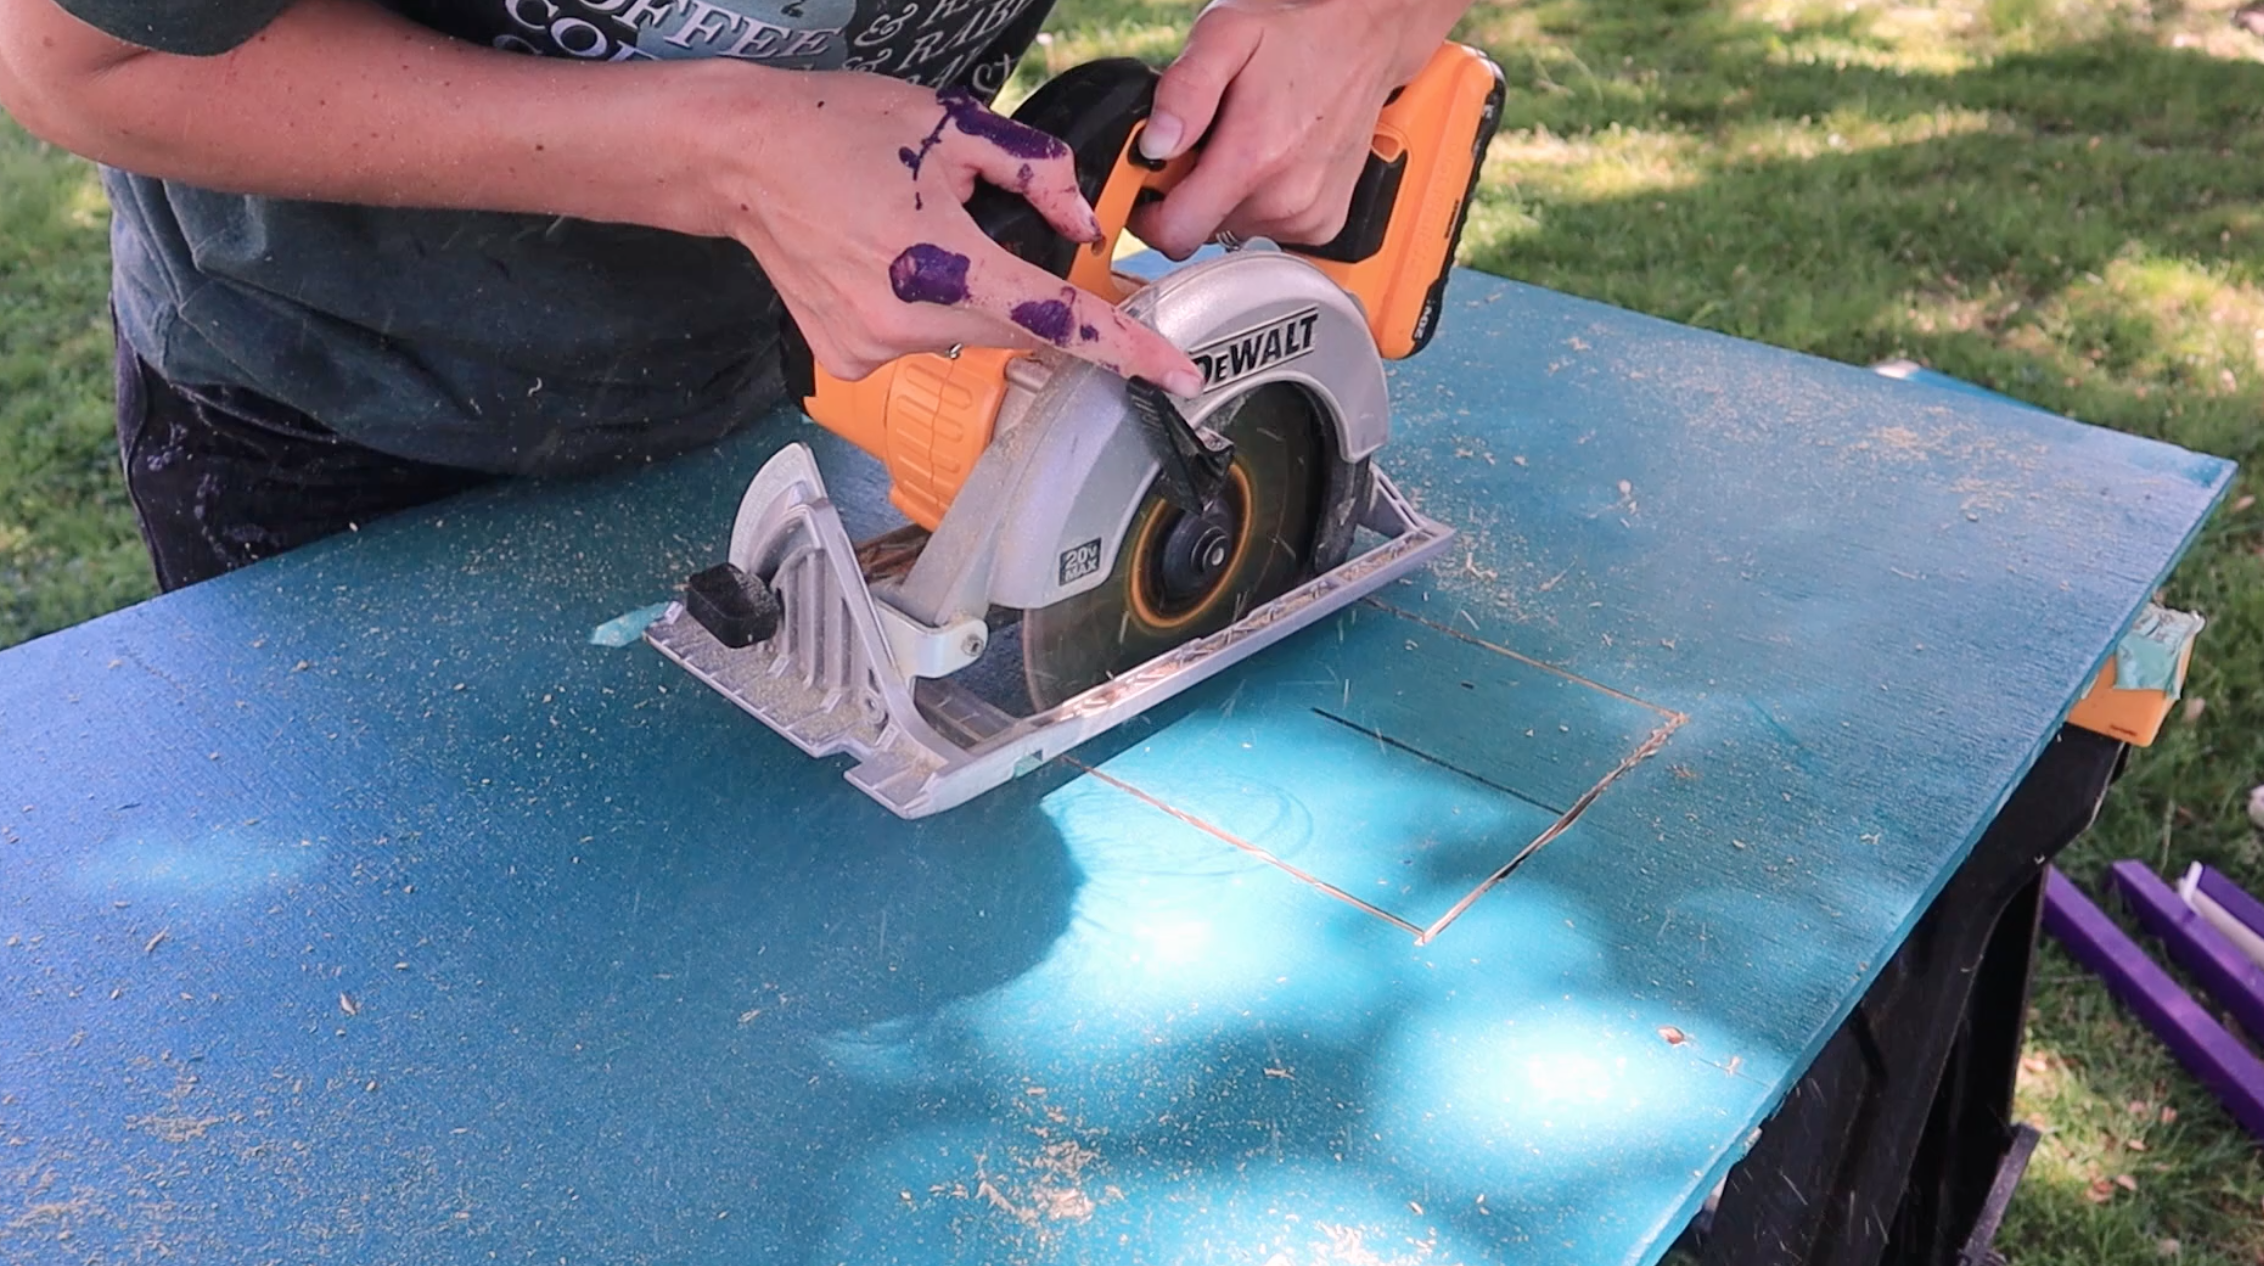
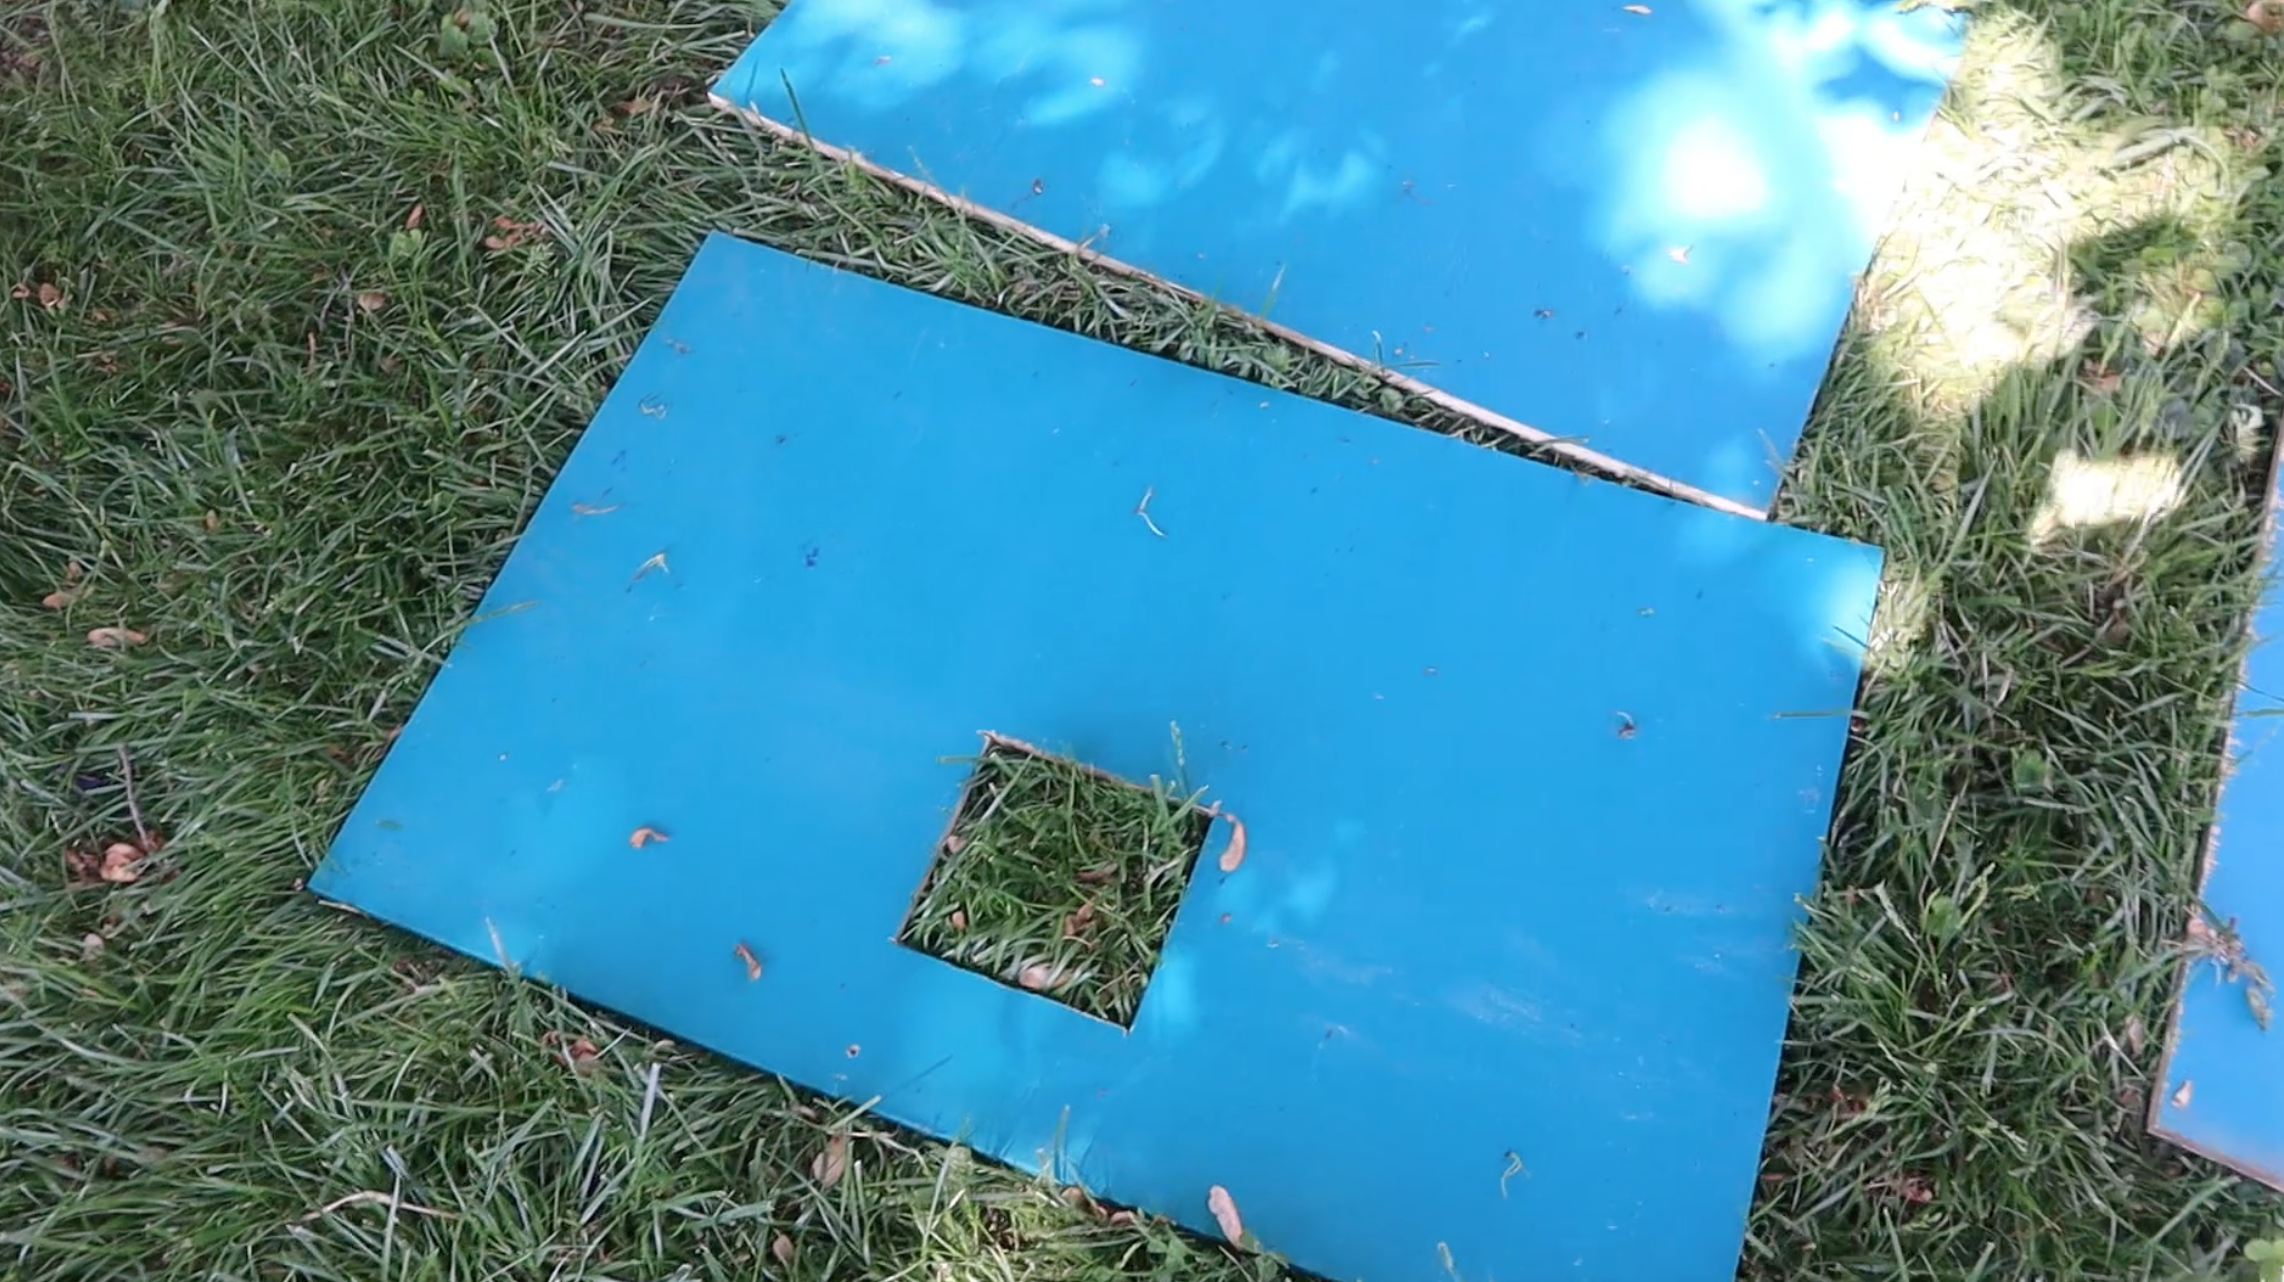
Cut a 6” x 6” hole in one of the larger pieces of plywood. This hole should be in the center, approximately 4” above the bottom and 15” from each edge.

Step 2: Paint
This step can be optional, but painting your rabbit tractor will give it an extra element of weatherproofing. Paint it whatever color you like and have fun with it! Just make sure that the paint you are using is water-based. I typically use an exterior latex-based paint with a satin finish.

I used Valspar’s “Plum Good” SeasonPlus paint in a satin finish
Step 3: Assemble The Top, Bottom, & Roof Frames
Begin by drilling pilot holes with a drill bit a little wider than your screw heads at the ends of your 6ft 2x2’s. Pilot holes are necessary to prevent cracking the wood when drilling the screws in. Once all of your pilot holes are ready, you can attach your 6ft 2x2’s to your 36” 2x2’s. for the roof, use your additional 36” 2x2 as an extra support in the middle (see below). It’s okay if it seems a little flimsy at this point! The next steps will remedy that.


Drill the 6ft pieces (long edge) into the 36” pieces (short edge)

Add an extra 36” piece to the middle of the “lid”
Step 4: Attach the Middle Supports
Drill two pilot holes just on the surface of each corner of your bottom frame. I like to drill the screws in just at the surface before I position the 2x4, and then I drill the screws the rest of the way in. The wide side of the 2x4 should be facing the short edge of the frame. You may have to drill a little bit angled so these new screws don’t run into the screws you already drilled when assembling the frame.
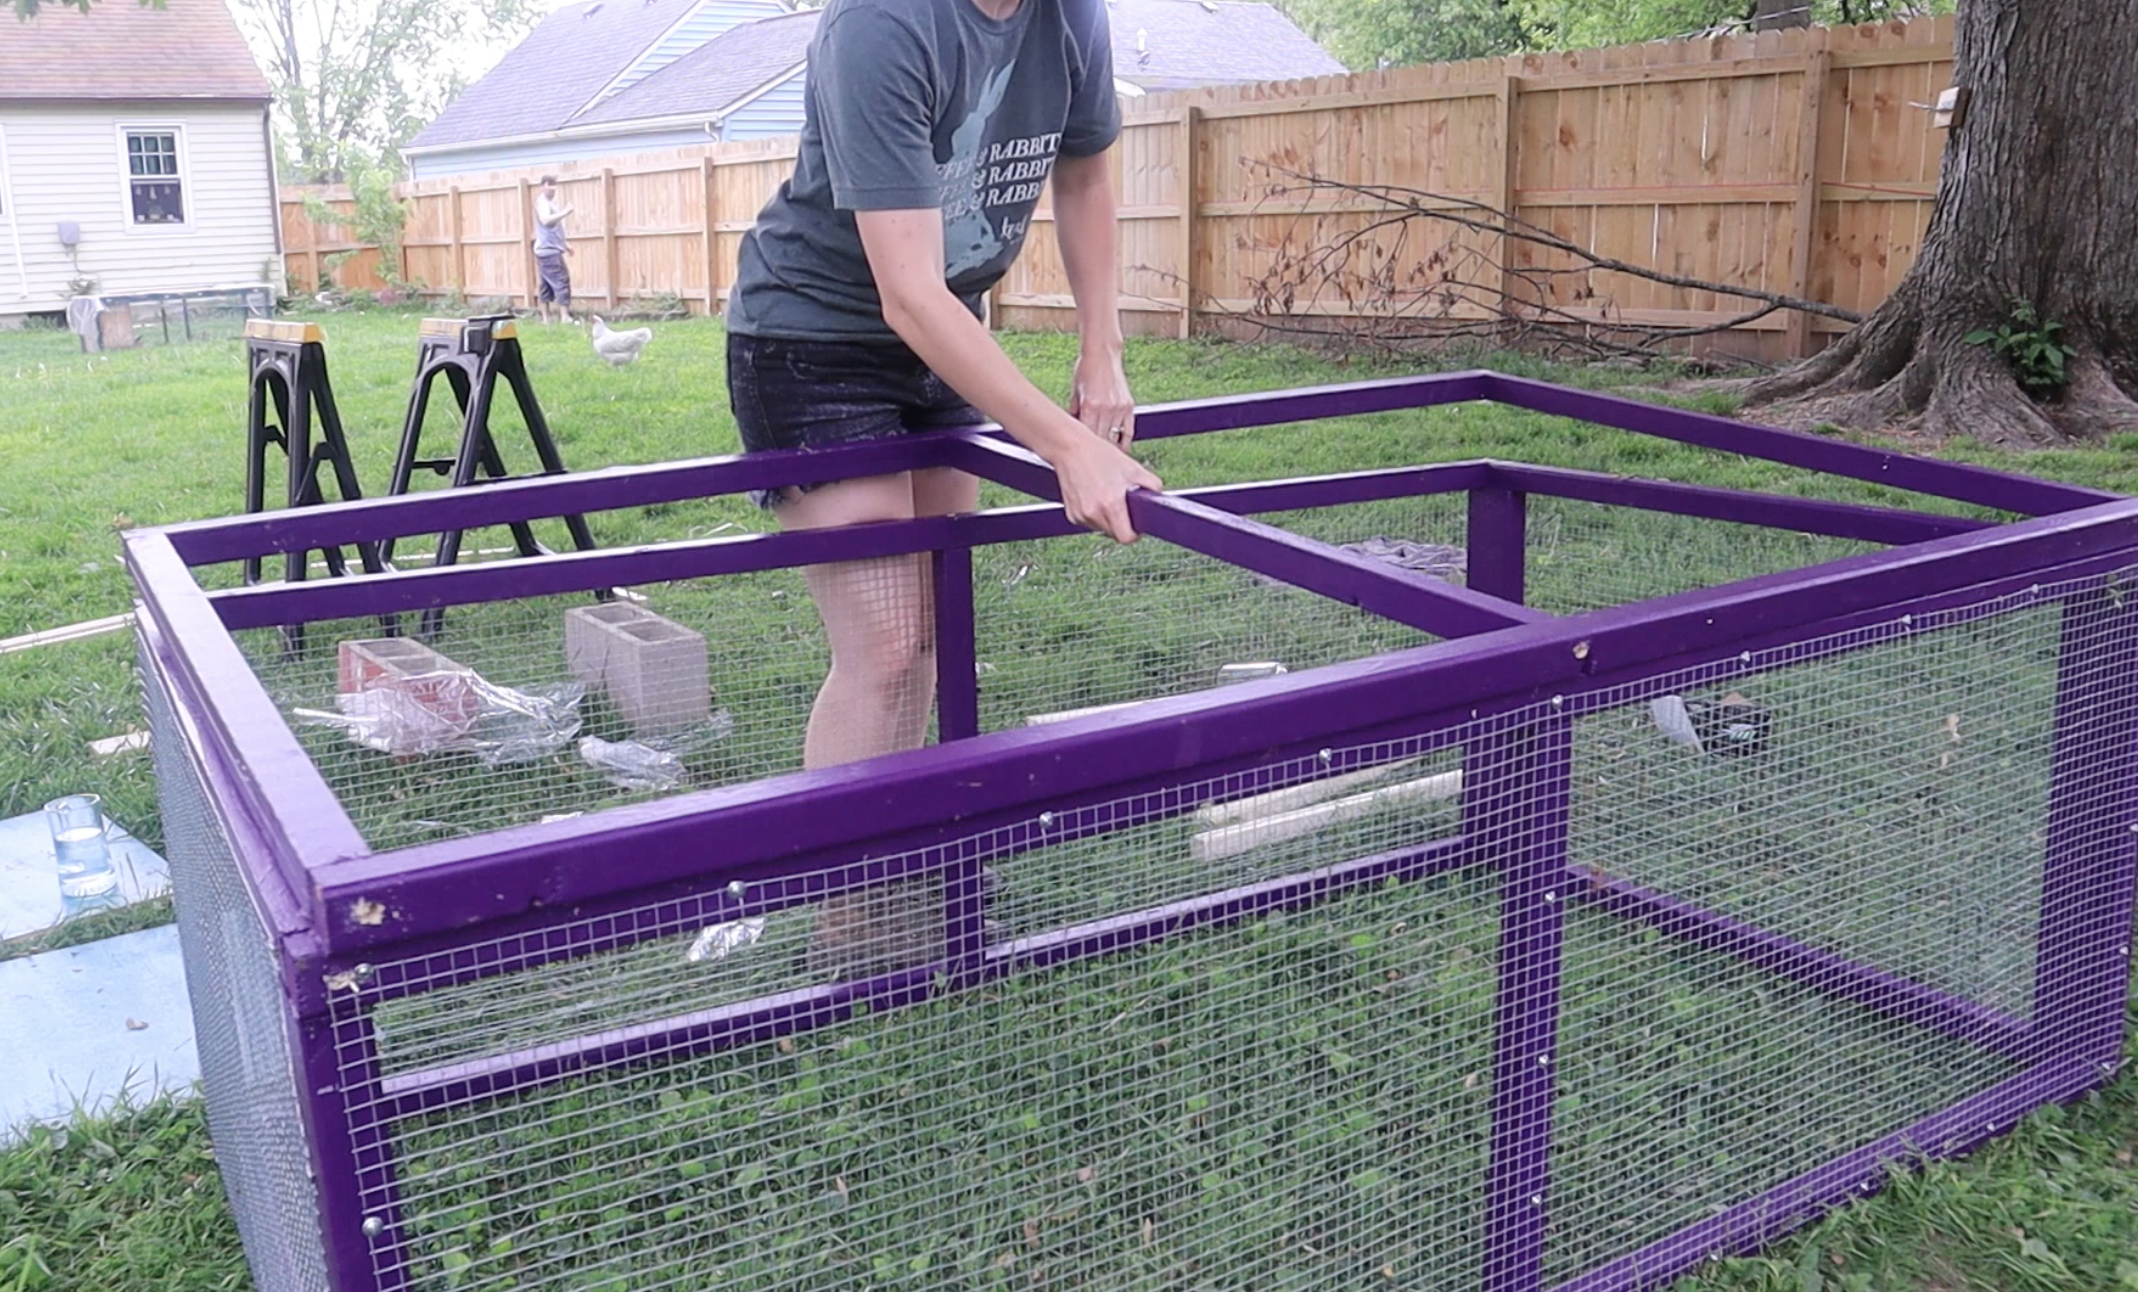
Attach all four 2x4 supports in each corner (they will look like table legs at this point). Once all supports are securely screwed into the bottom frame, flip it over and repeat the same thing with the top frame. At this point the tractor will look like a simple box.
With your two remaining middle supports (22.5” tall 2x2’s), measure to the middle of the long edge of the box on both sides. Drill pilot holes at these marks, and then screw the 2x2’s in as extra support. Flip the structure again and repeat on the same side.


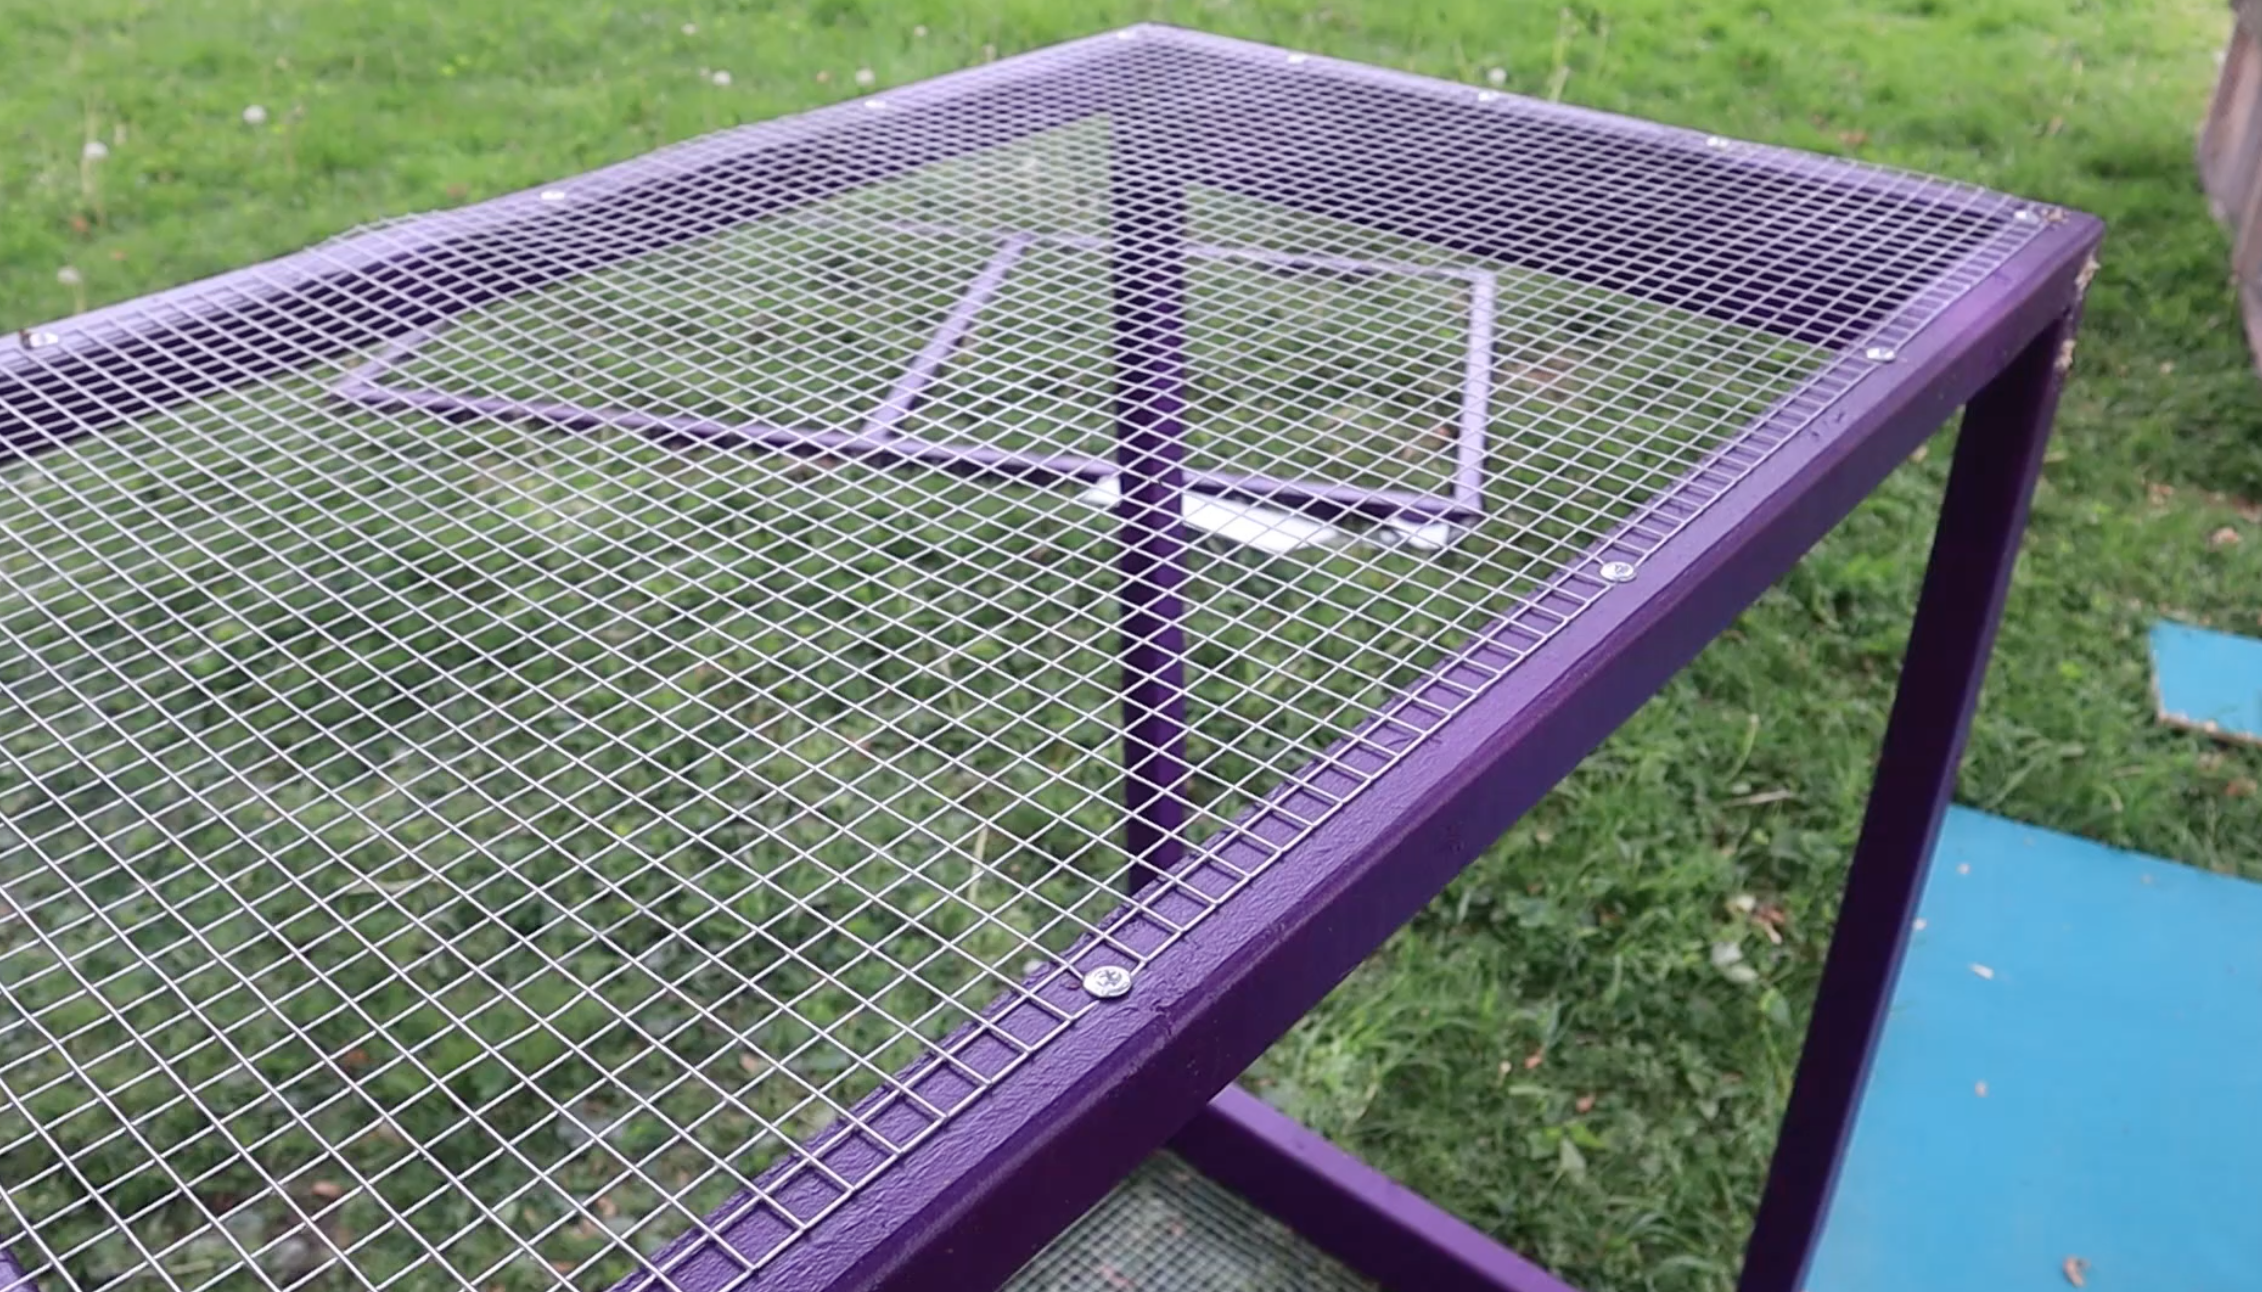
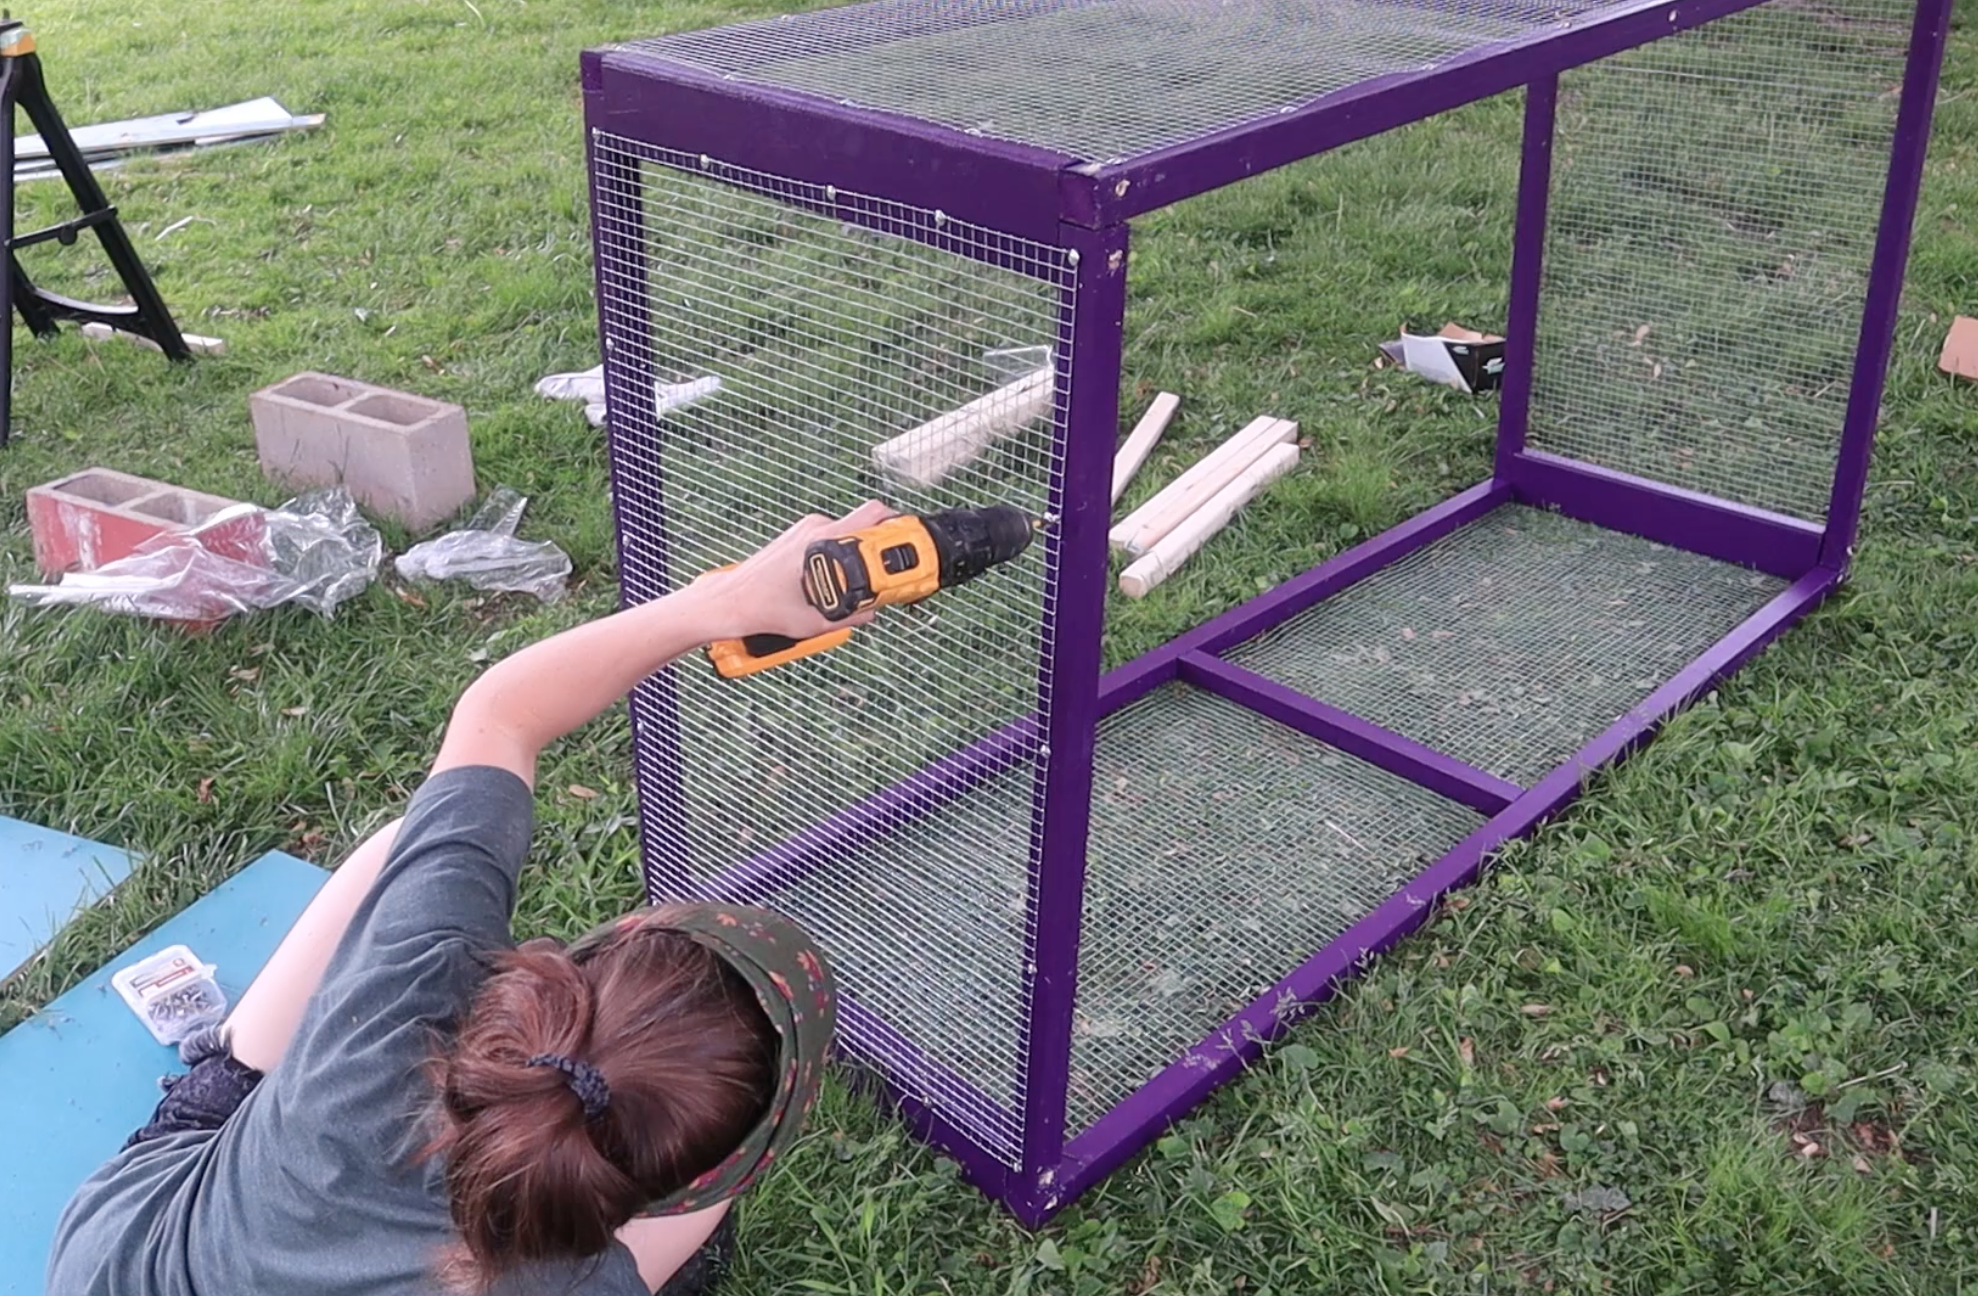
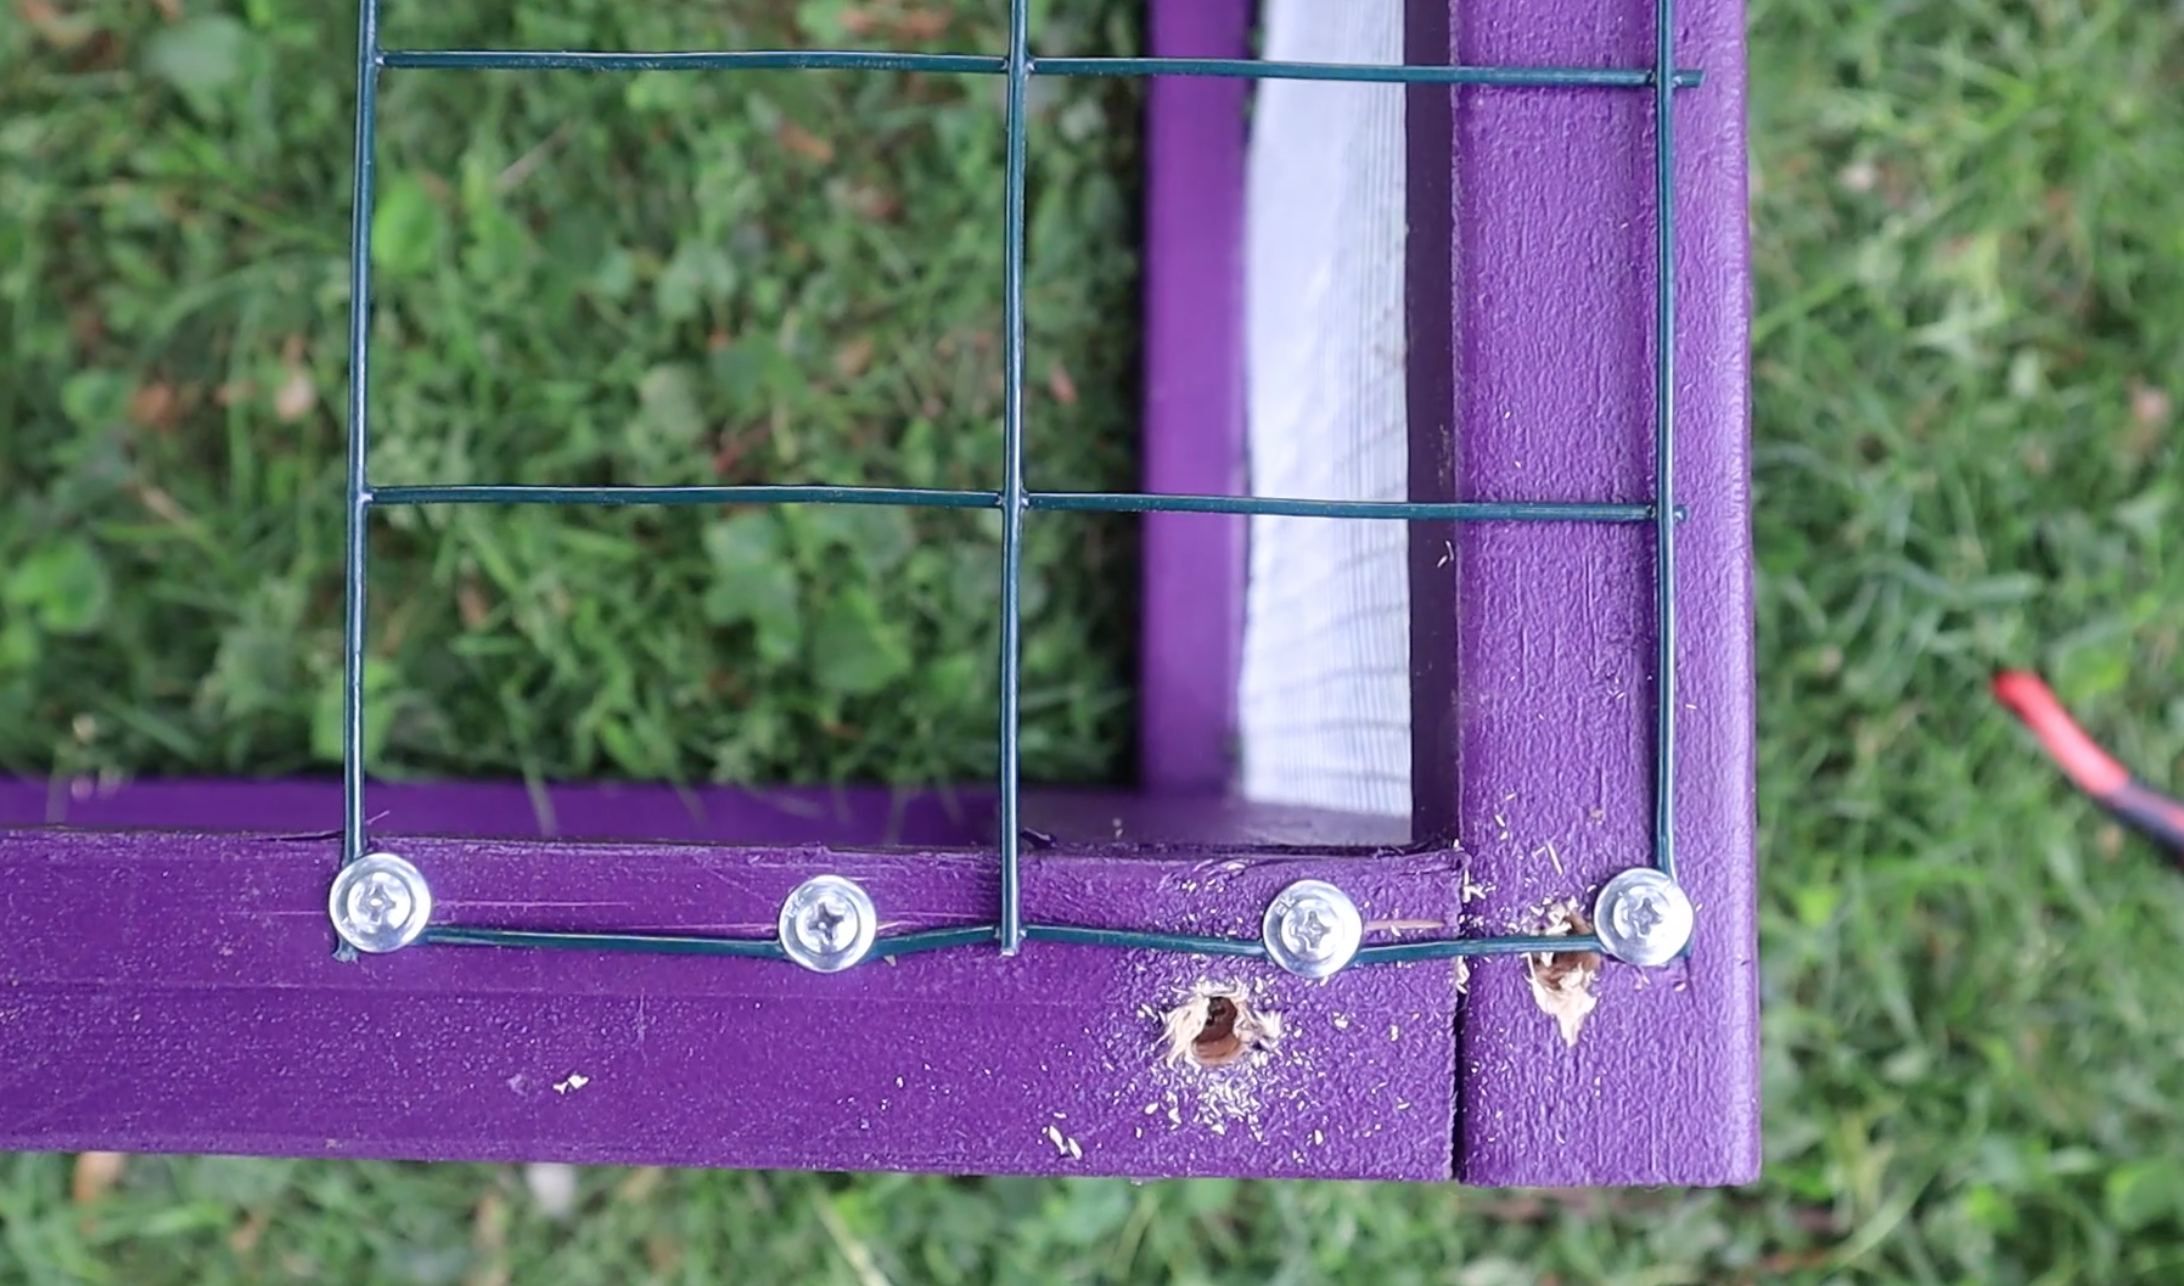
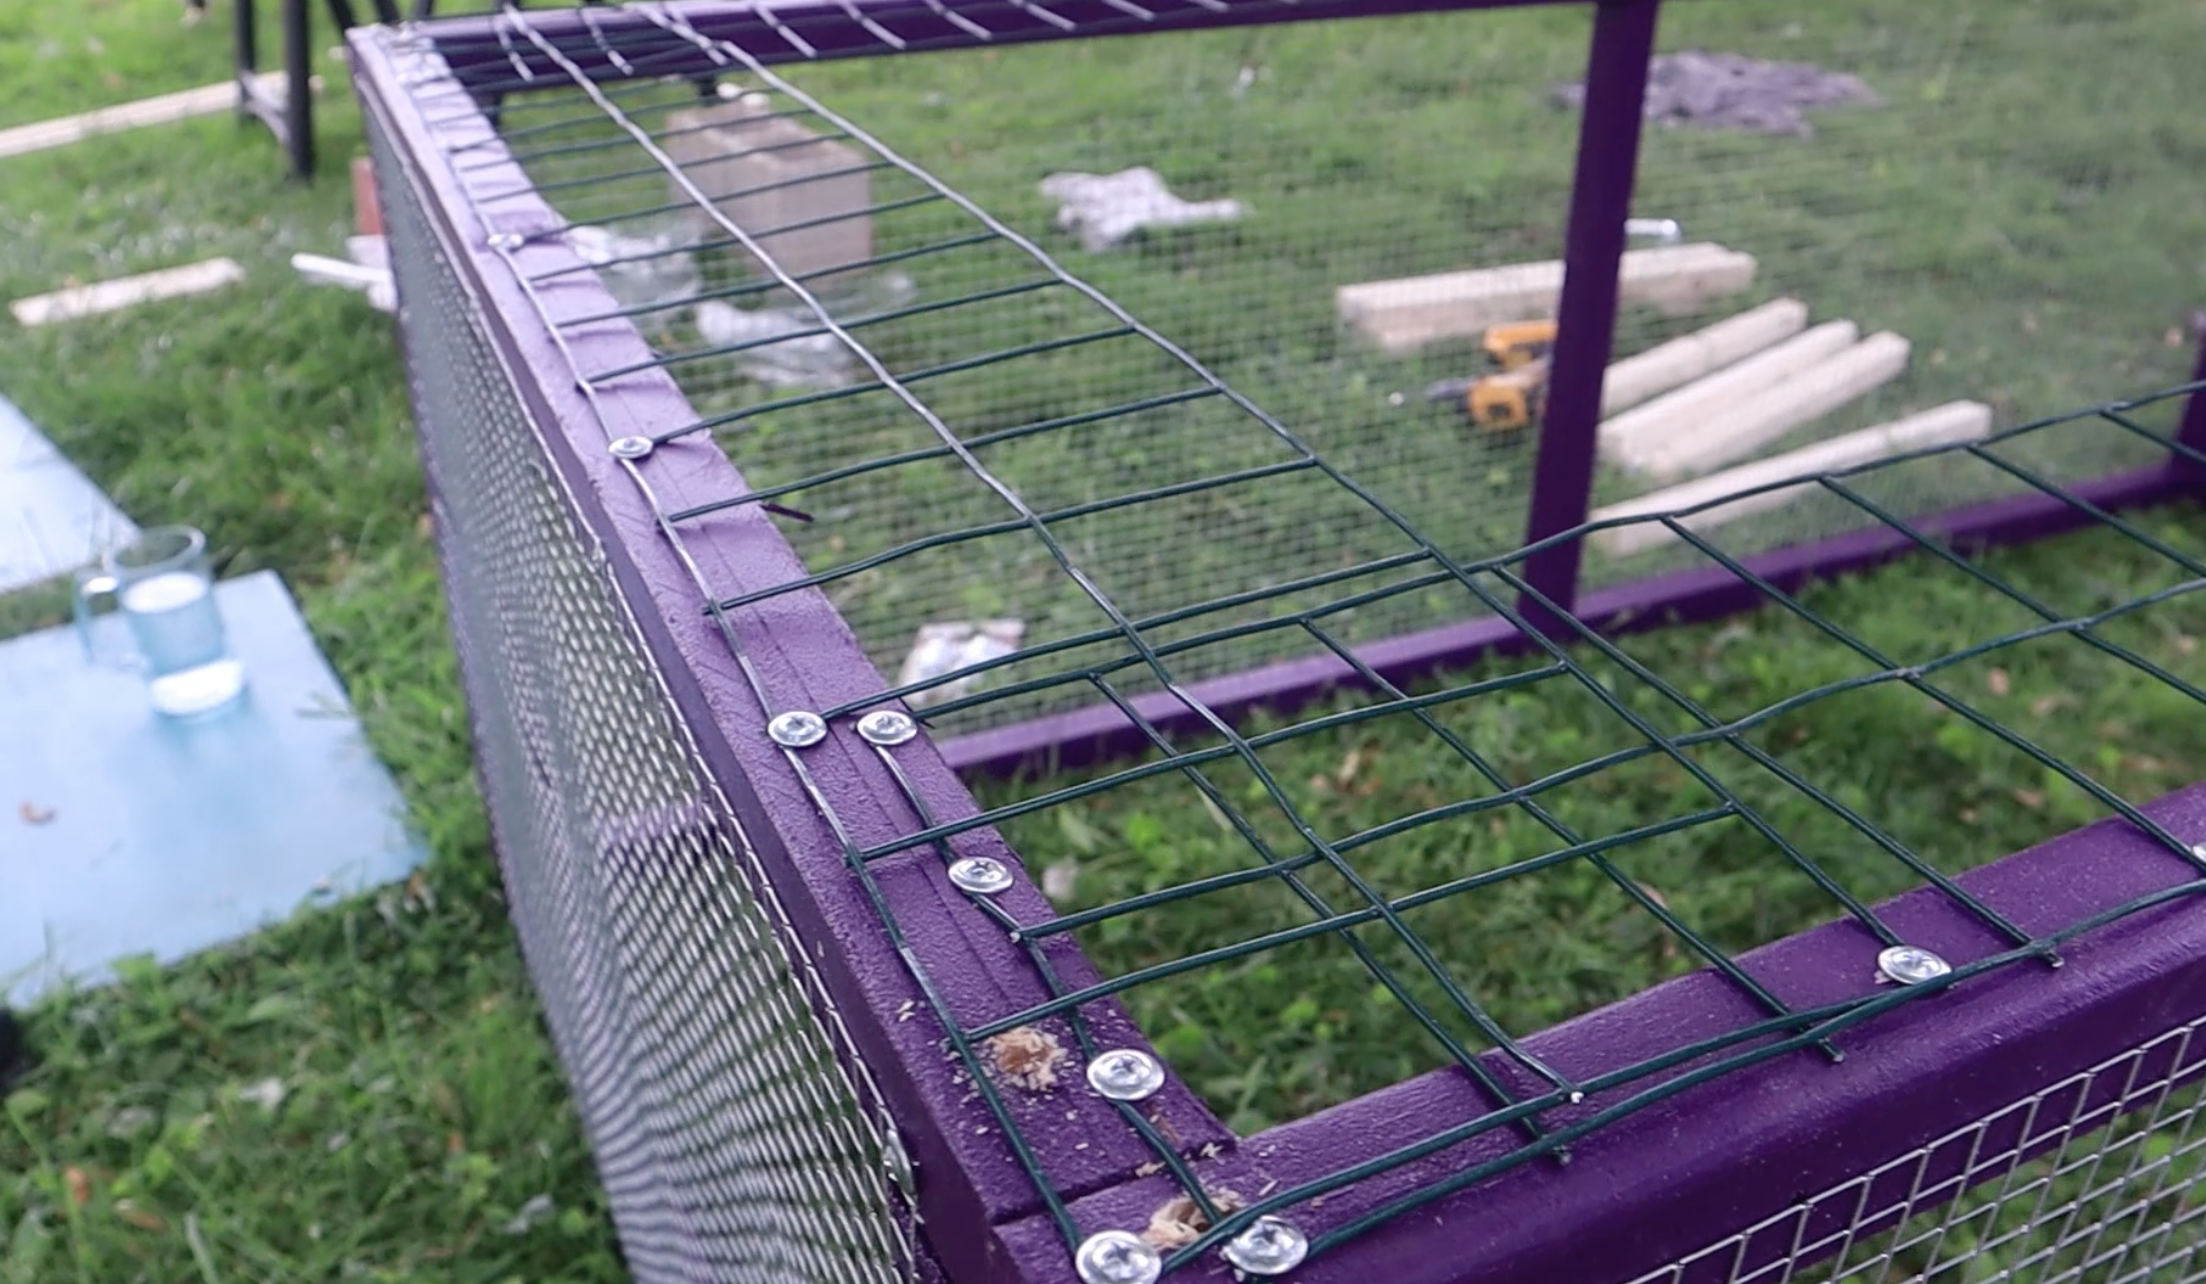
Step 5: Attach Hardware Cloth to the Sides
Using 24” high hardware cloth, cut two pieces approximately 71” long. This should fit just about perfectly on both sides of your tractor (leave the top and bottom open for now). I use sharp-point lath screws to attach hardware cloth to wood by screwing into the corners of the wire tightly (see the photos below). You can use as many screws as you want to secure any bowing in the wire. On the short edges, cut two pieces approximately 30.5” long. Make sure you have a little over half of the 2x4 exposed on the short edges so you have room to drill holes later on (for the pull ropes).

Step 6: Attach PVC-Coated Wire to the Bottom
I like my rabbits to be able to eat as much grass as possible when they are in their tractors. Many people fence the entire bottom of their tractors off, but I find that for the most part, it is unnecessary (unless, perhaps, you live in an area with a large predator population). Fencing the entire bottom of the tractor can push grass down too much, and for this reason mainly, I only fence a couple inches of the border on my tractors.
Using PVC-coated garden wire with 3x2 openings, I cut two strips* about 70” long for the bottom long edge, and two strips about 34” long for the short edges. I attach these strips TIGHTLY to the bottom of the tractor using lath screws - you want to make sure there is no looseness or bowing. Overlap at the corners. This is typically dig-proof enough, especially if you will be moving your tractor daily (which, you should).
*By “strips” I typically cut the wire in skinny strips to only include two 3” openings. Each strip is approximately 6” wide - see illustration below.

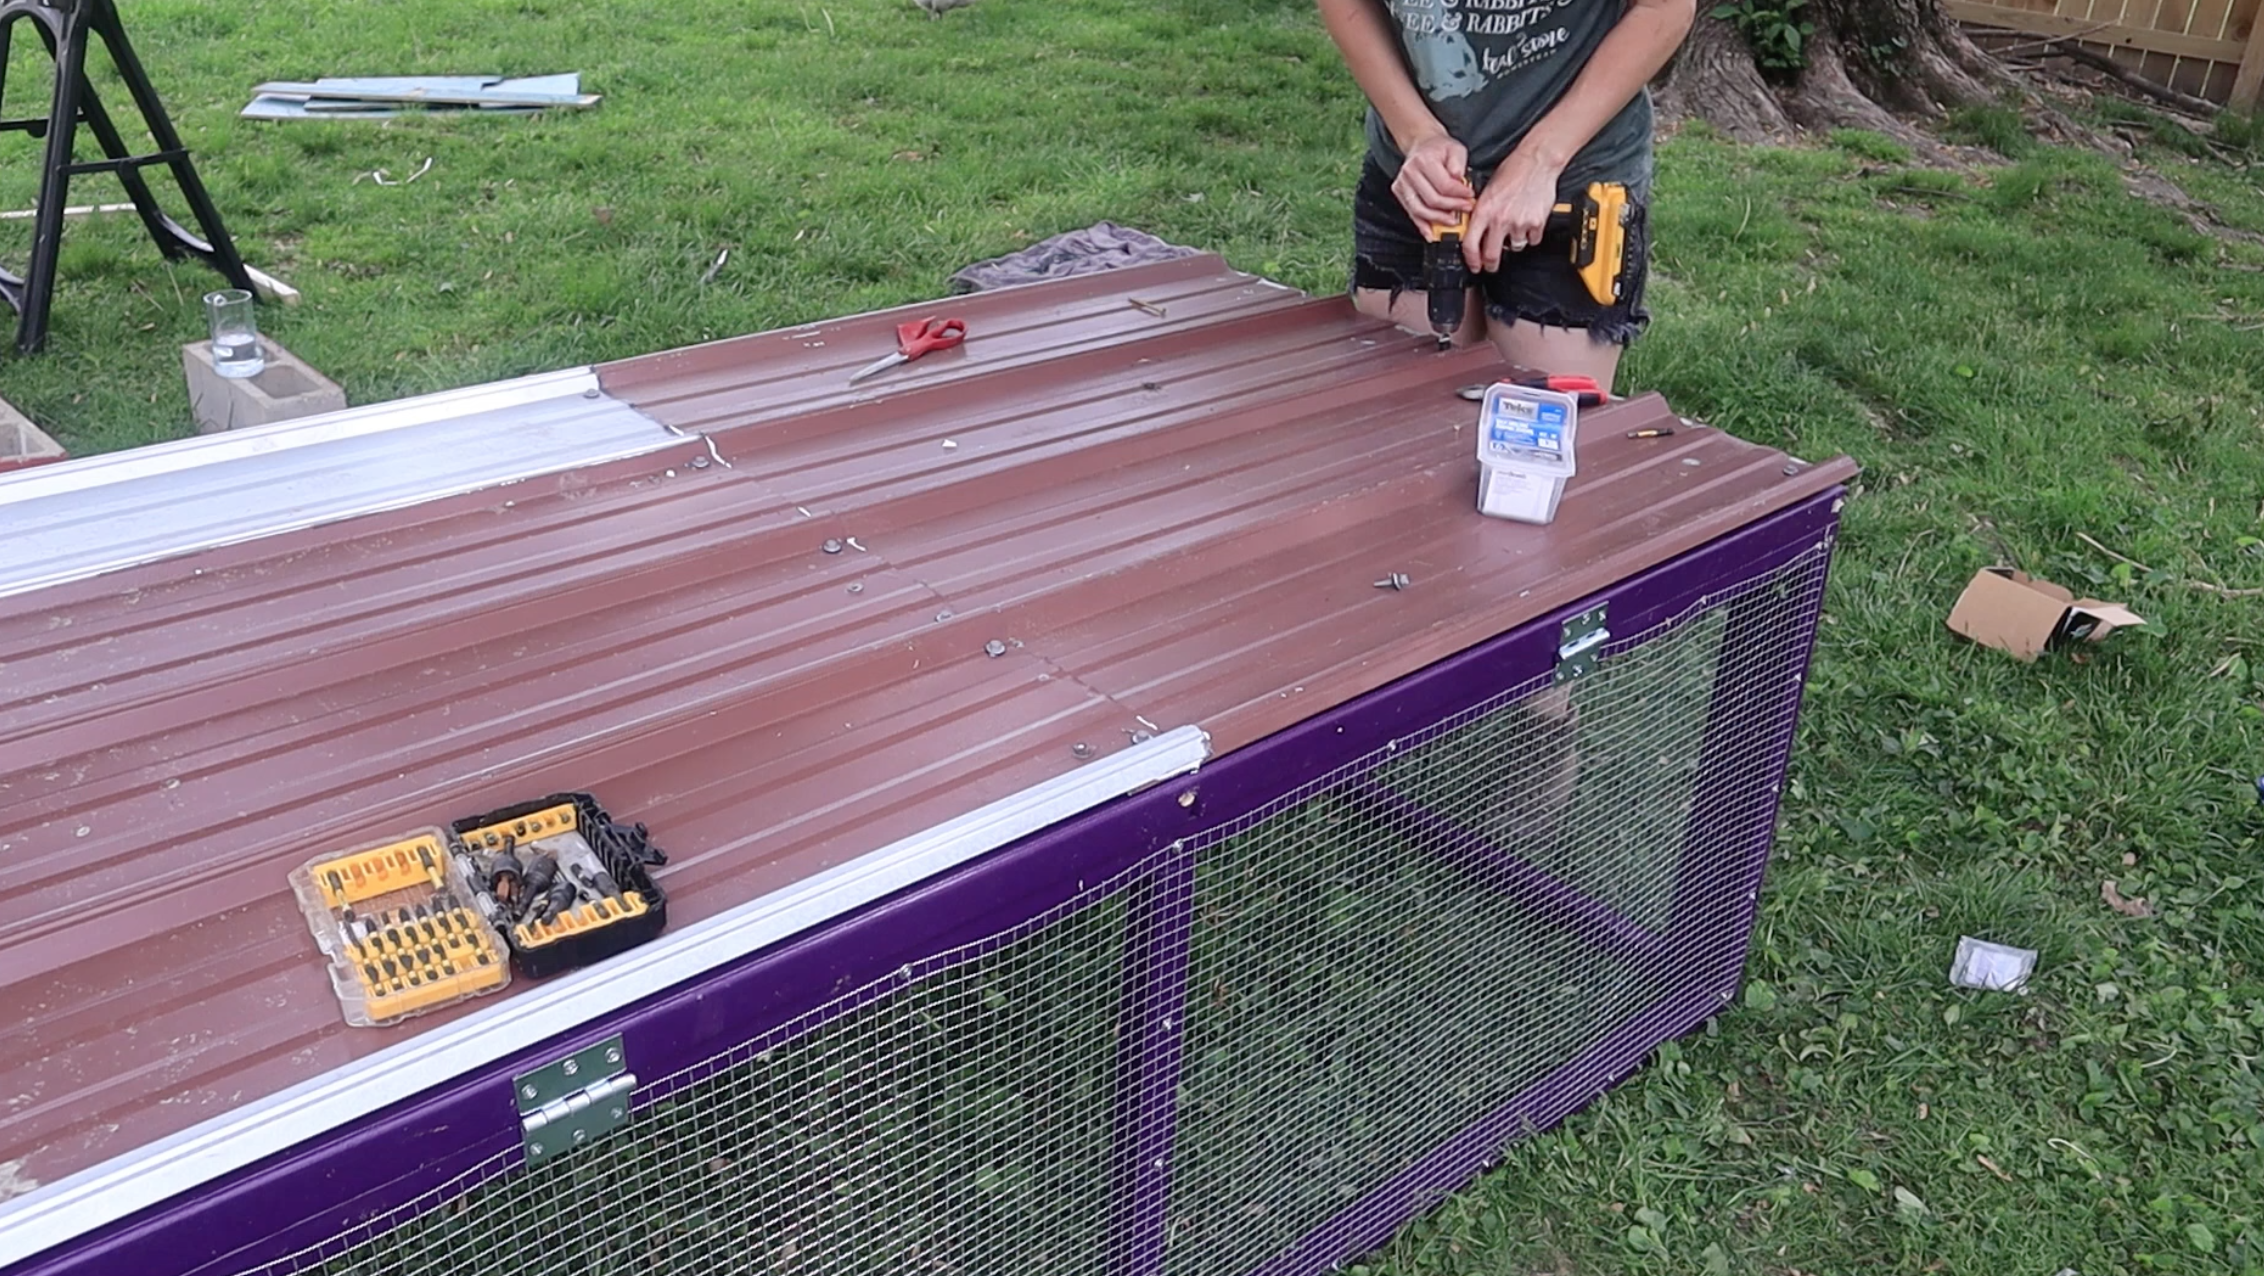
Step 7: Assemble the Roof/Lid
Using hinges, attach the roof frame to the top of the rabbit tractor and make sure there are no issues or weakness in opening and closing.
Cut your roofing panel to size if necessary. 3.17ft wide is standard for some panels at Lowe’s. The perfect length for my tractors is around 75” long, so you may need to cut your panel to get to this length. I actually used old roofing pieces and patch-worked them together using waterproof silicone. Anything to save money!
Using self-drilling roofing screws with a weather-tight seal, attach your metal roofing securely to your frame.
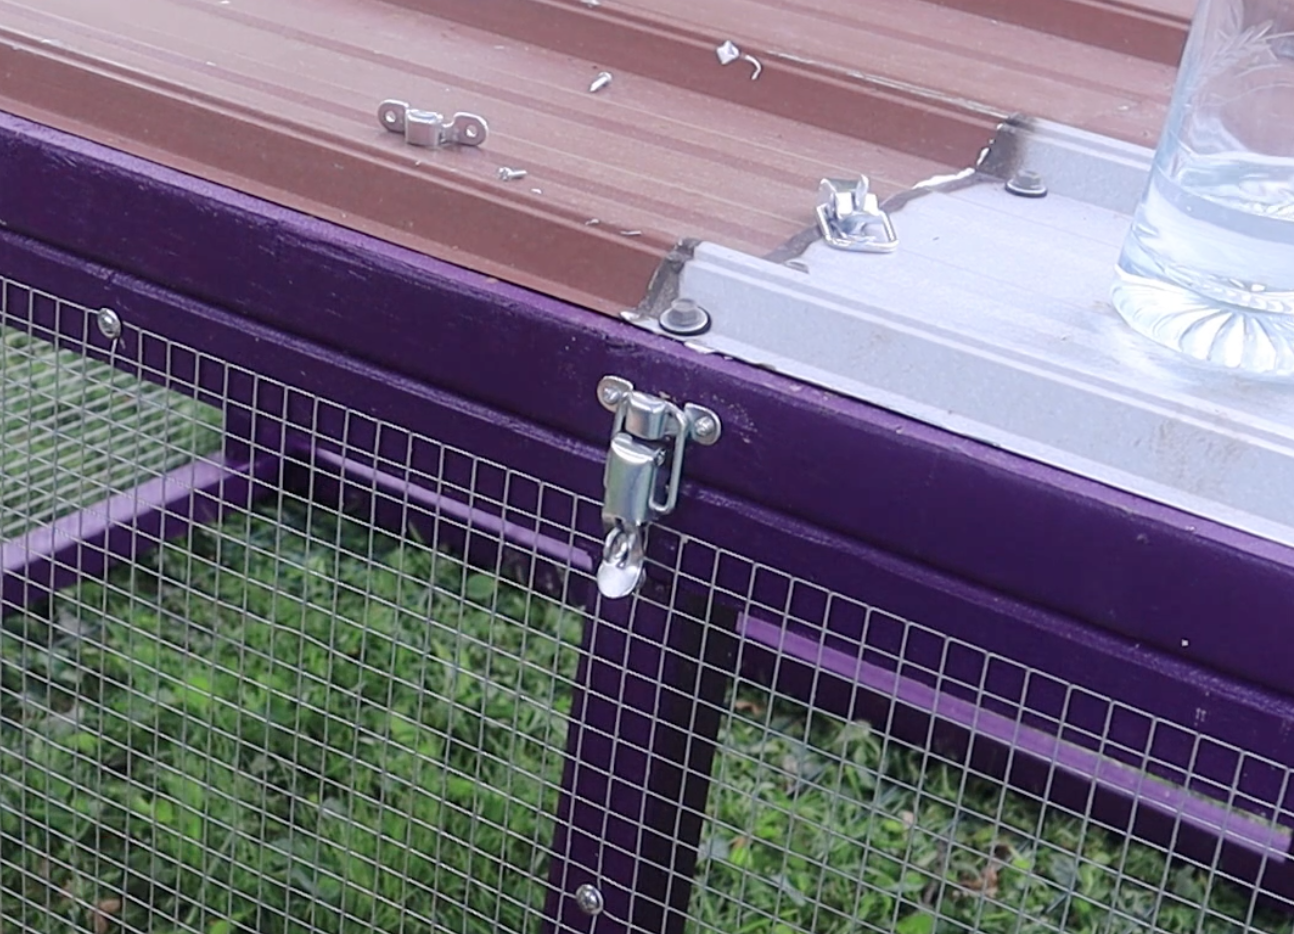
To make sure the wind doesn’t blow the lid upwards, add a lockable touch-catch to the front of the tractor. This will also allow you to lock the tractor up and prohibit theft of your rabbits.

Step 8: Attach the Pull Ropes
Use your 5/8” drill bit and drill holes into 2x4 on the short sides of the rabbit tractor near the top (see photo). Placement doesn’t need to be perfect, I just kind of eyeball this! Once your holes are drilled in, you’re ready for the rope.
Fun fact: I used to run a small rope collar and leash making business for dogs on Etsy, so I tend to have a lot of cotton rope still hanging around! It definitely is my go-to choice for these pull straps due to the fact that it is soft on the hands and has just the right amount of give. I don’t have exact measurements on the amount of cotton rope needed, but you really don’t need much! 20-25ft. should be more than enough.
To easily push the rope ends through the holes you can use duck-tape to secure it tightly together, and then use a twisting motion to get the rope through. Knot the ends of the rope on the INSIDE of the tractor - this is typically too high for the rabbits to really care about it. Once you have a tightly pulled knot, you can cut the duct tape off (you’re welcome to leave it on as well, but typically it’s not necessary with tightly-knotted cotton rope).
Step 9: Create the Burrow/Den
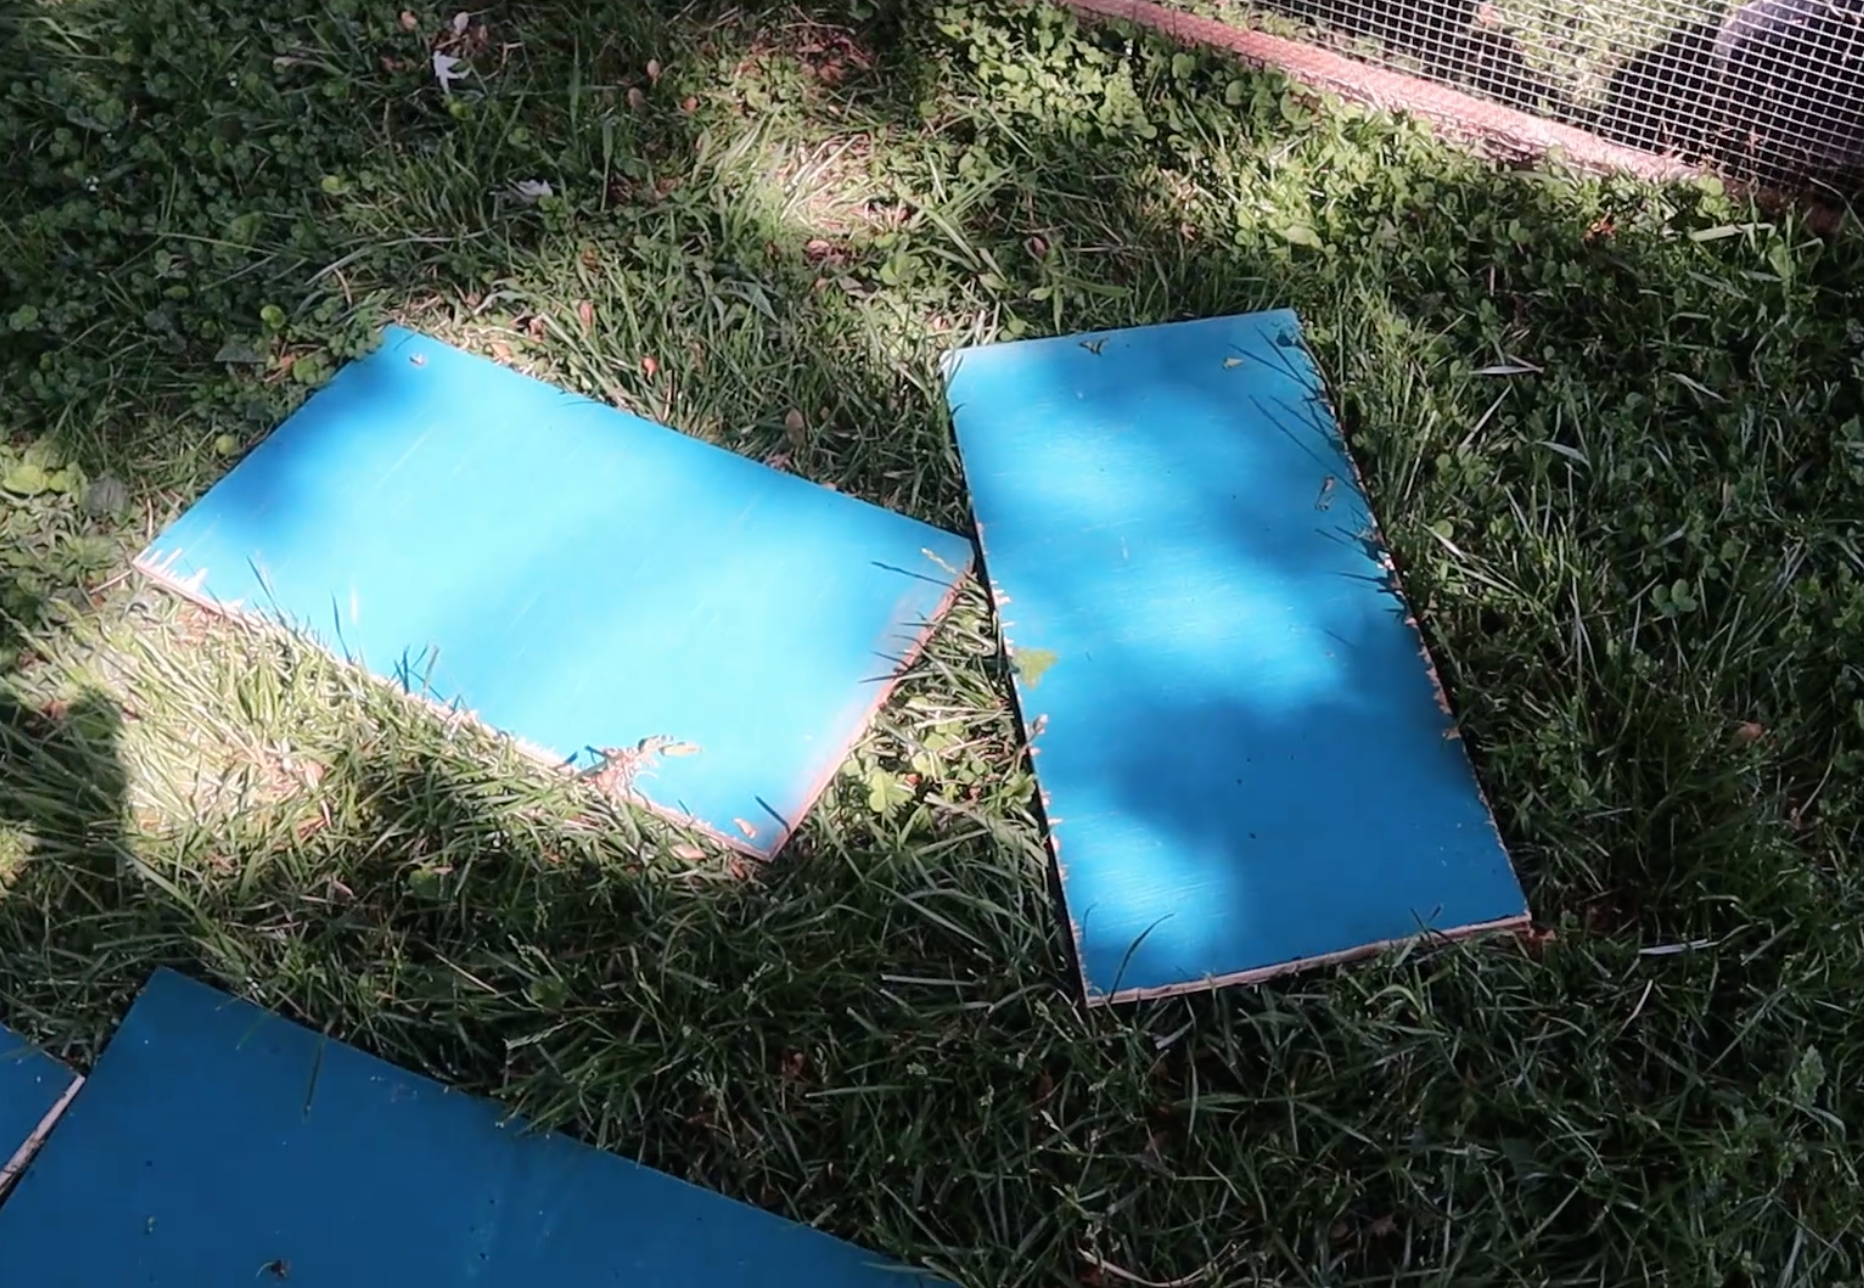
I always make my den areas on the right side of the tractor when you are facing it, but you’re welcome to put it on whatever side that you want! Start by screwing in the 24.5” tall x 36” wide piece of plywood without the hole cut out in all four corners to one of the short edges on the inside of the tractor. Sometimes I cut these pieces just a tad under 36” wide in order to fit without needing a hammer to pound it in. Once your first piece is in, screw the 12” wide plywood sides in. And lastly, screw in your final 36” long piece. This part is a little tricky because you will need to drill in the corners into the side of the 12” pieces.
This blog post is still being edited. Check back for more info soon!


I live in north-central Indiana in the country with my husband, our two dogs, and a lot of animals :) I love to craft and DIY and I’m obsessed with learning new things. I am driven by coffee and my love for animals. Learn more…